1. Overview
AI Fit Finder provides smart size recommendations to help customers choose the perfect fit, reduce returns, and boost conversions.
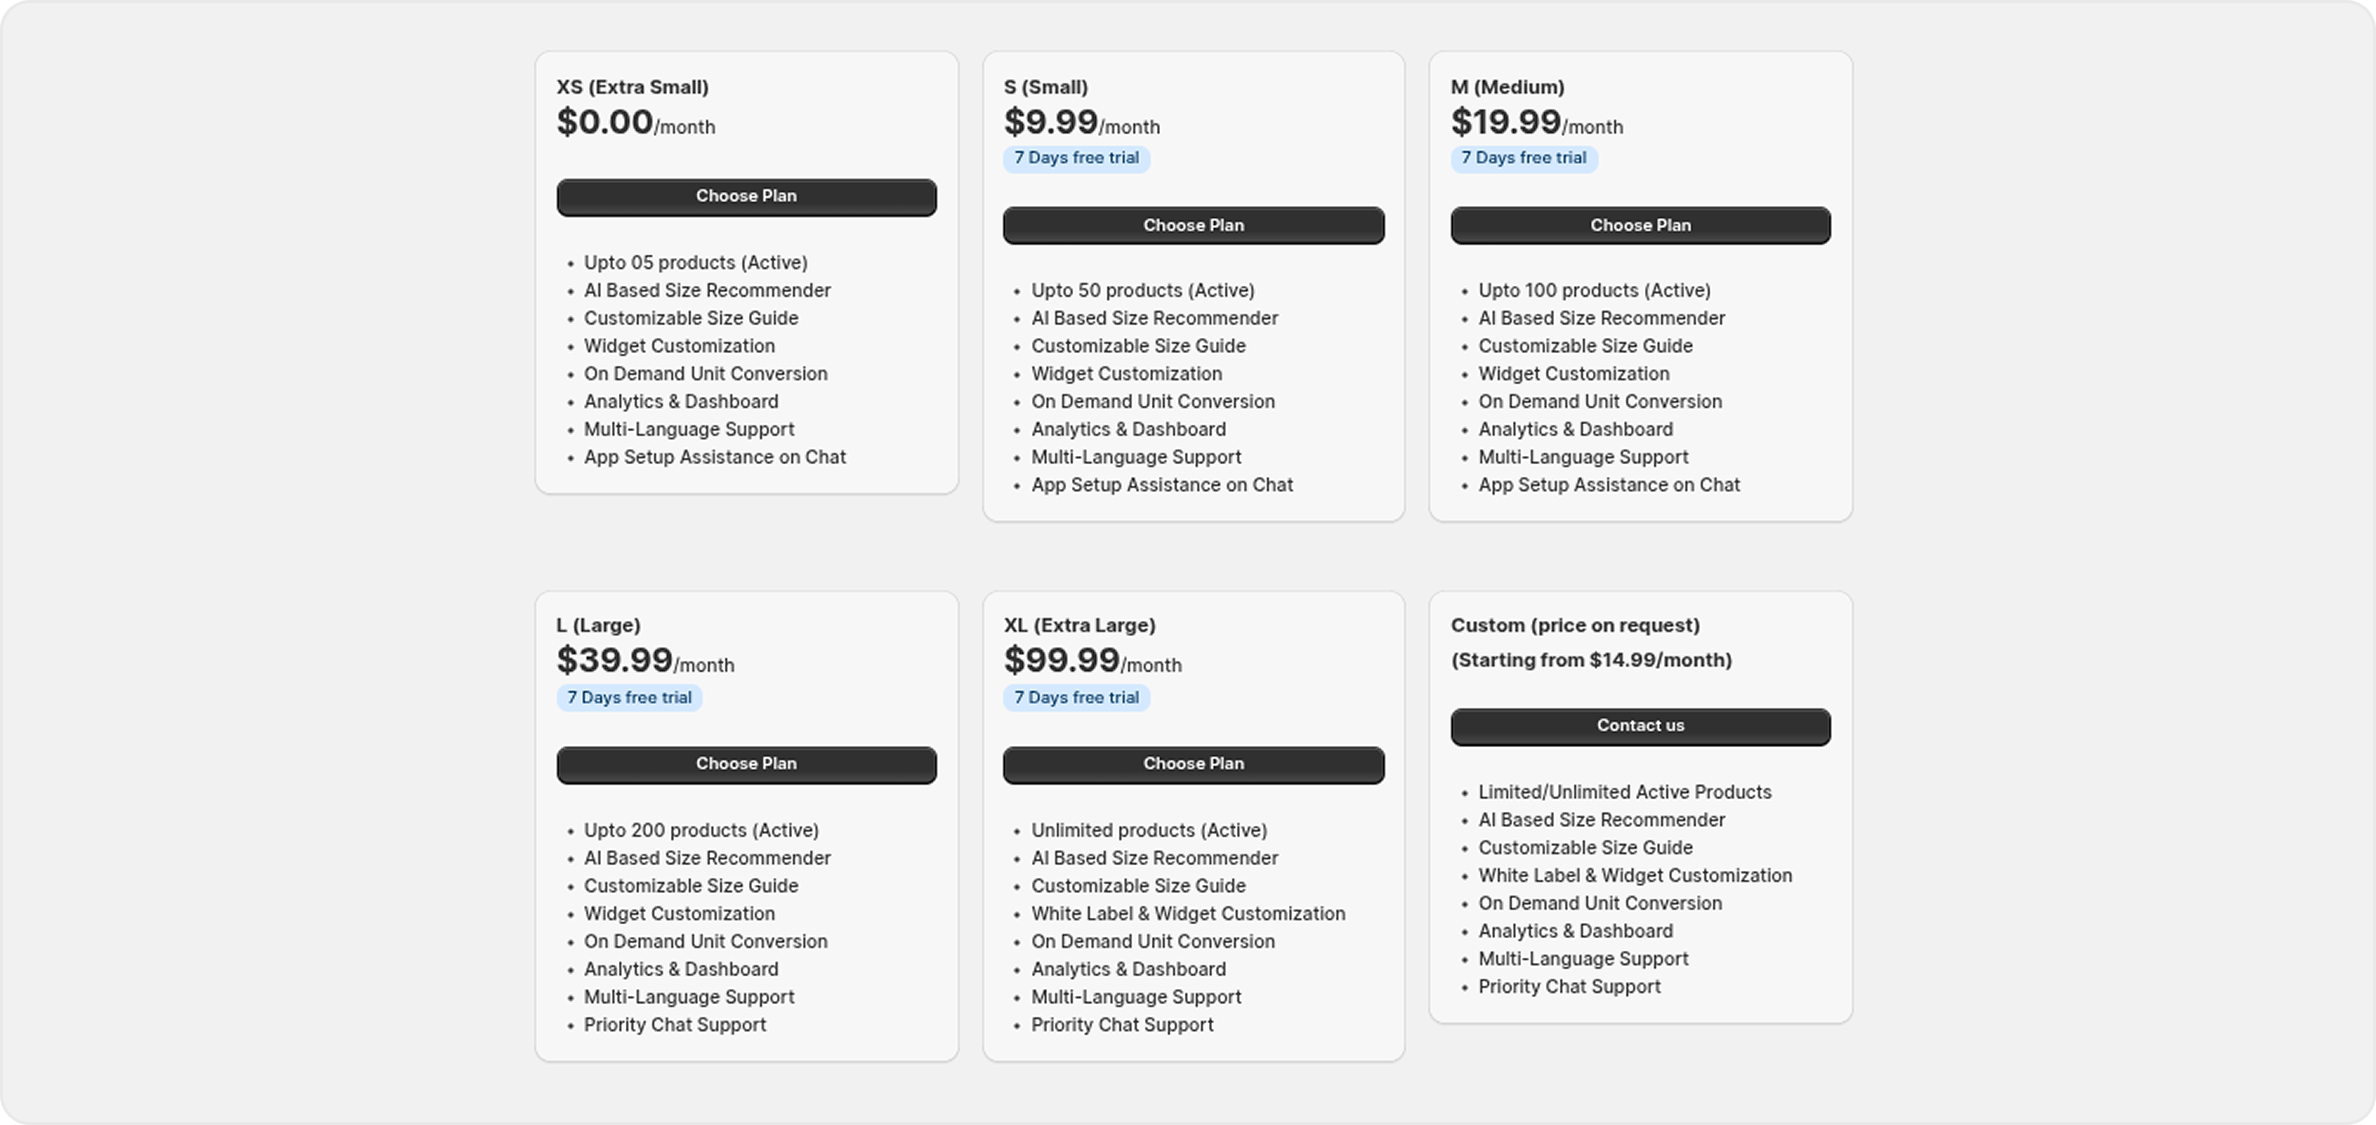
2. Plans & Offers
Select a Monthly Plan:
Choose a monthly plan based on your needs. Each plan includes different features for your widget.
Enjoy a 7-day free trial before subscribing.
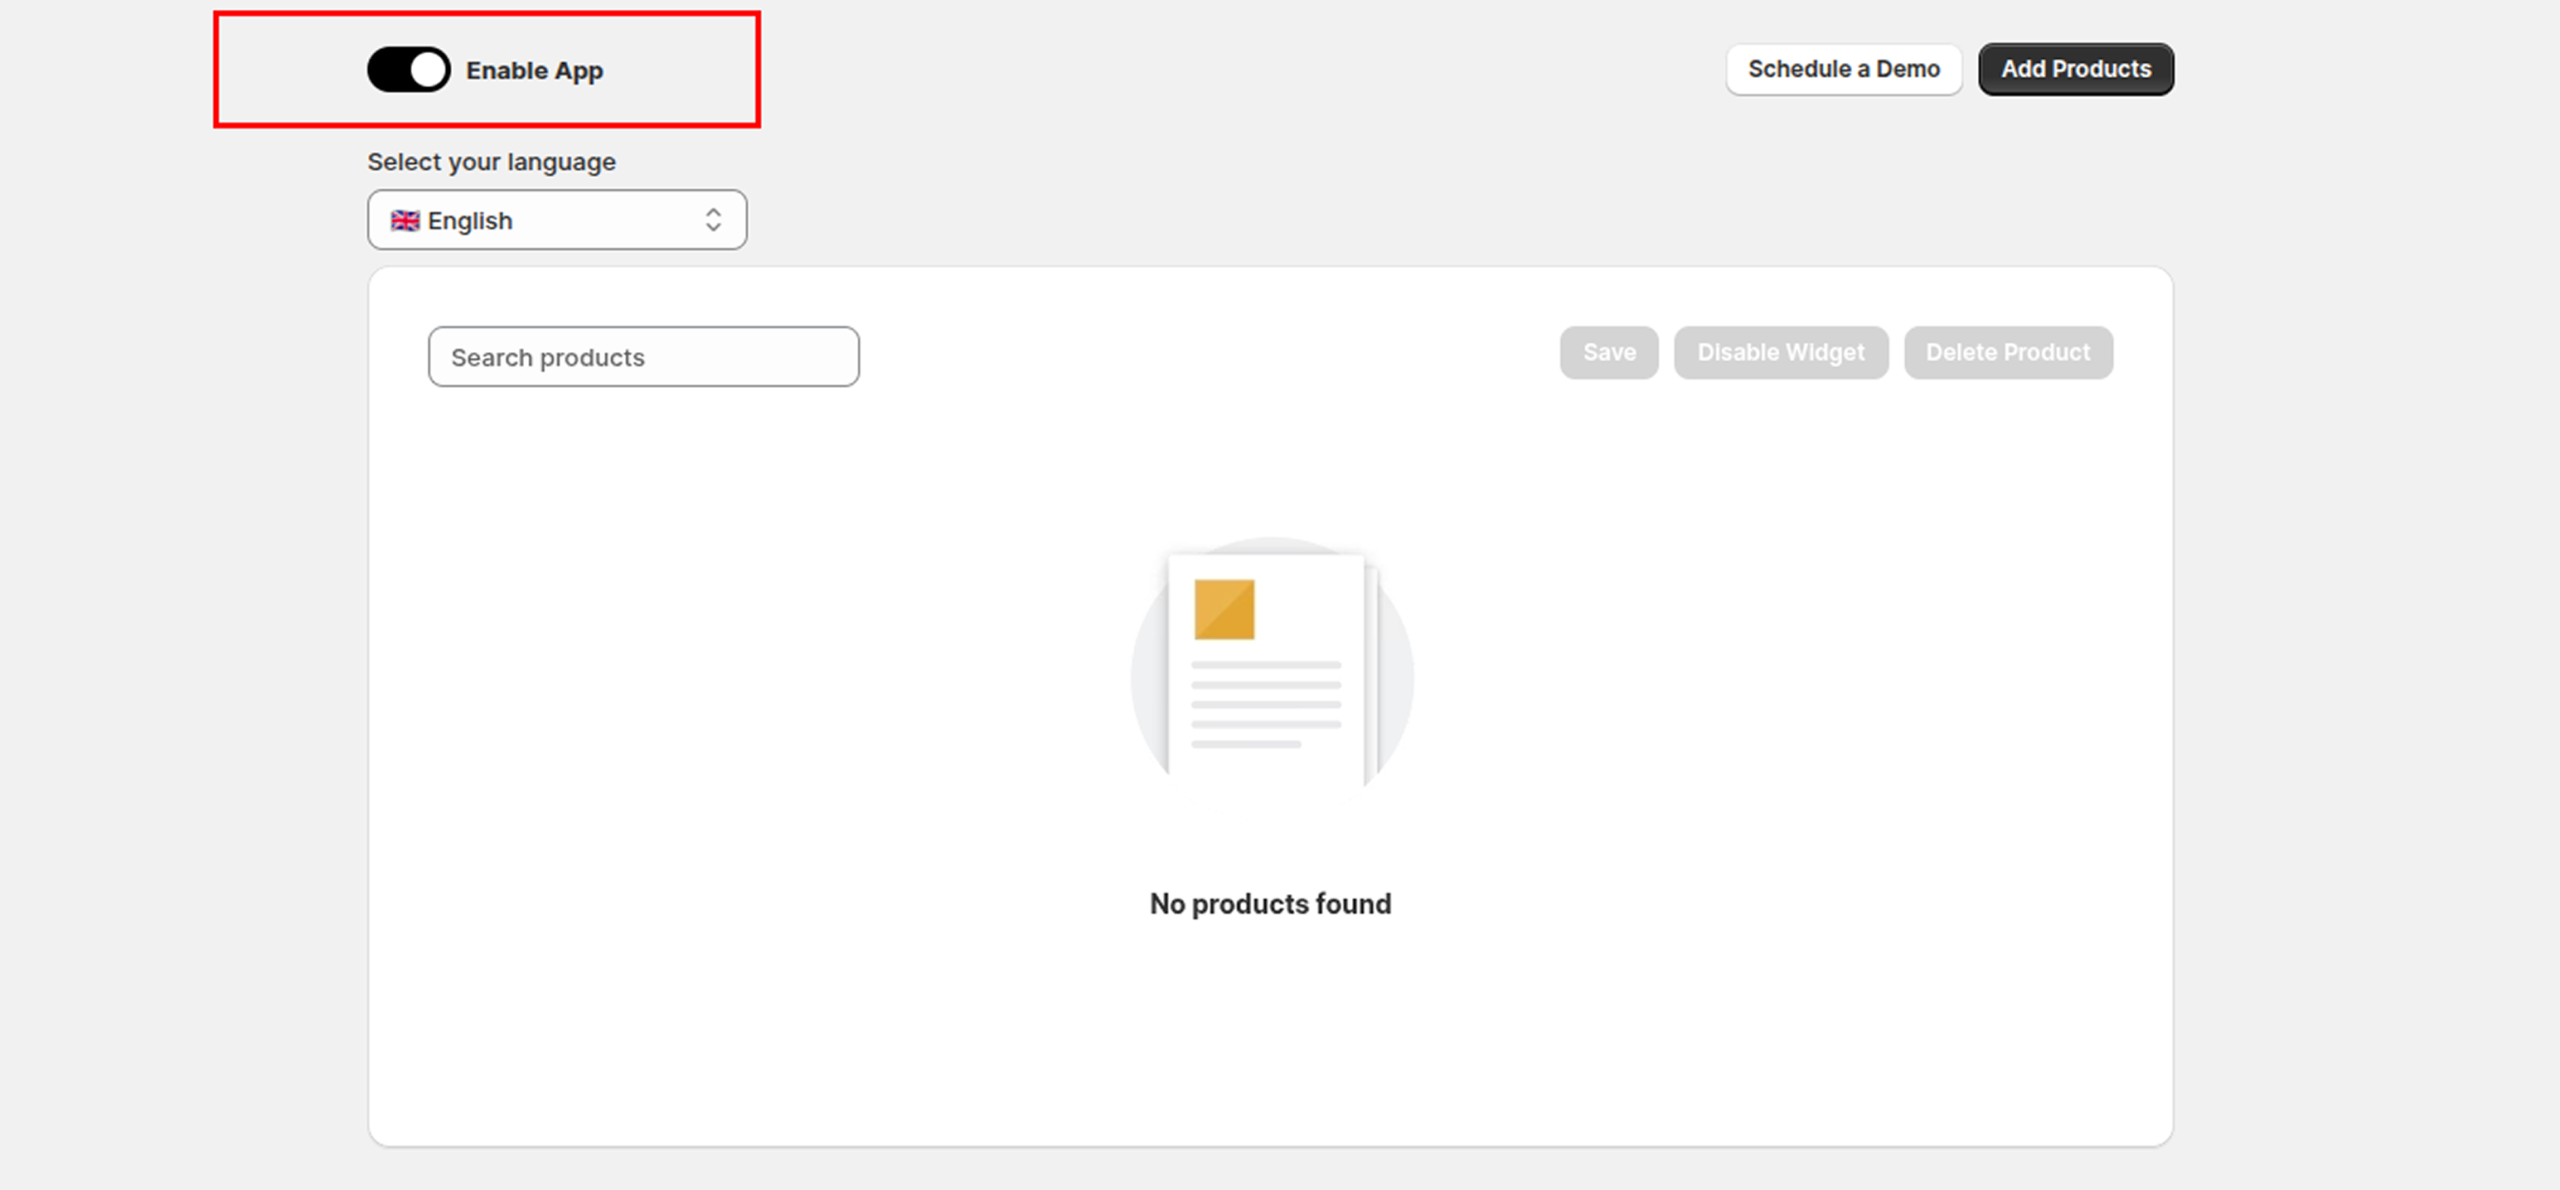
3. How to Enable or Disable the App
You can easily enable or disable the app from the Dashboard. Simply use the toggle switch located in the top-right corner to turn the app on or off anytime.
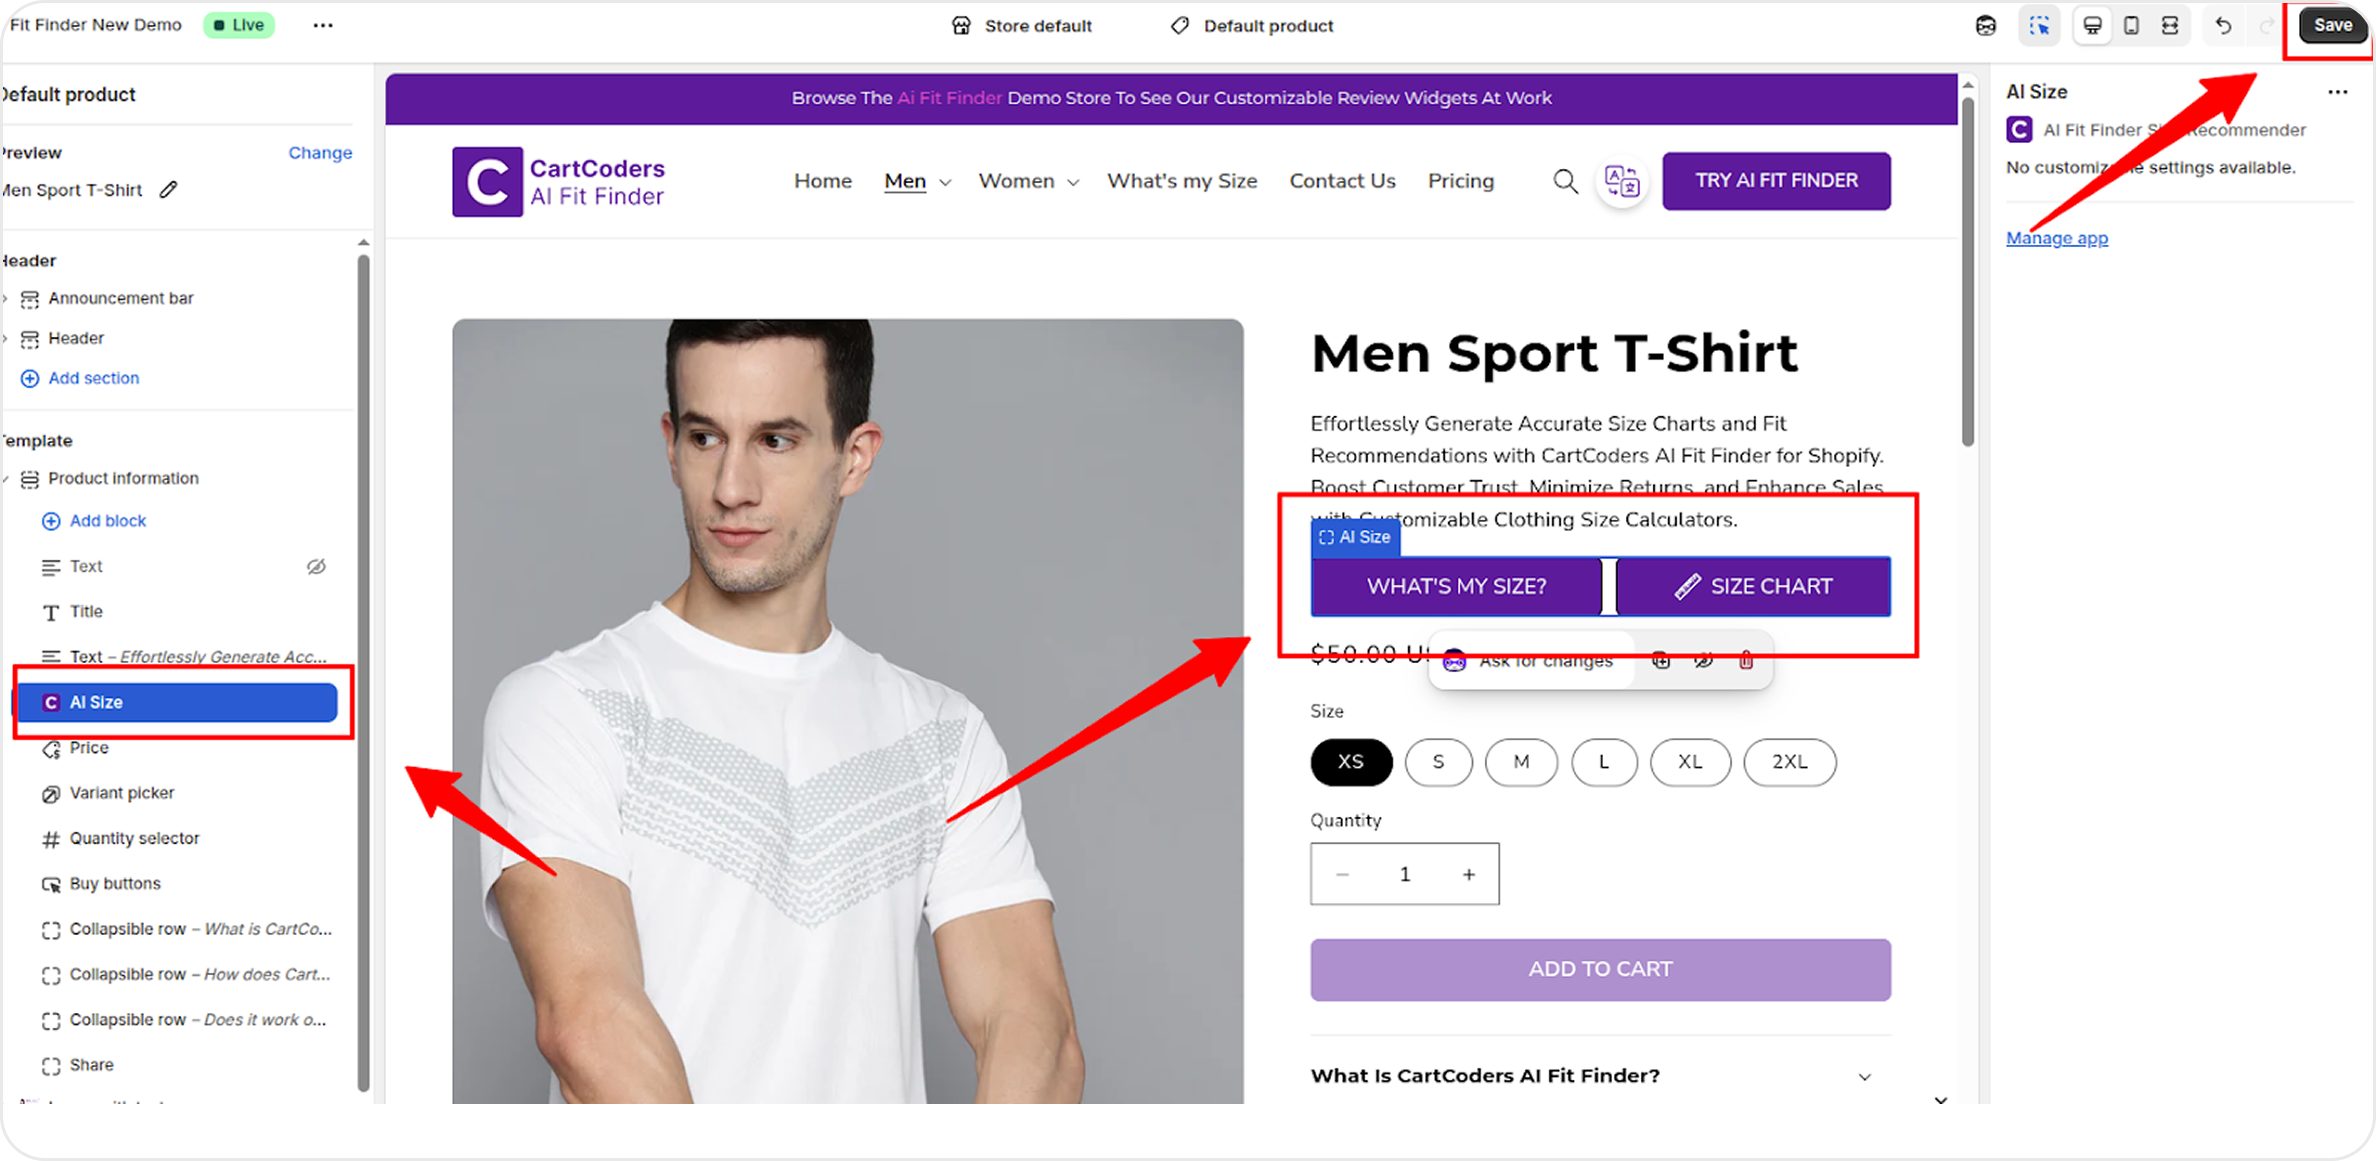
4. How to Add the App Block to Your Theme
To add the app block, open your store’s Theme Customizer. From there, drag and position the app block where you want it to appear on your product page.
Once placed, click Save in the top-right corner to apply the changes.
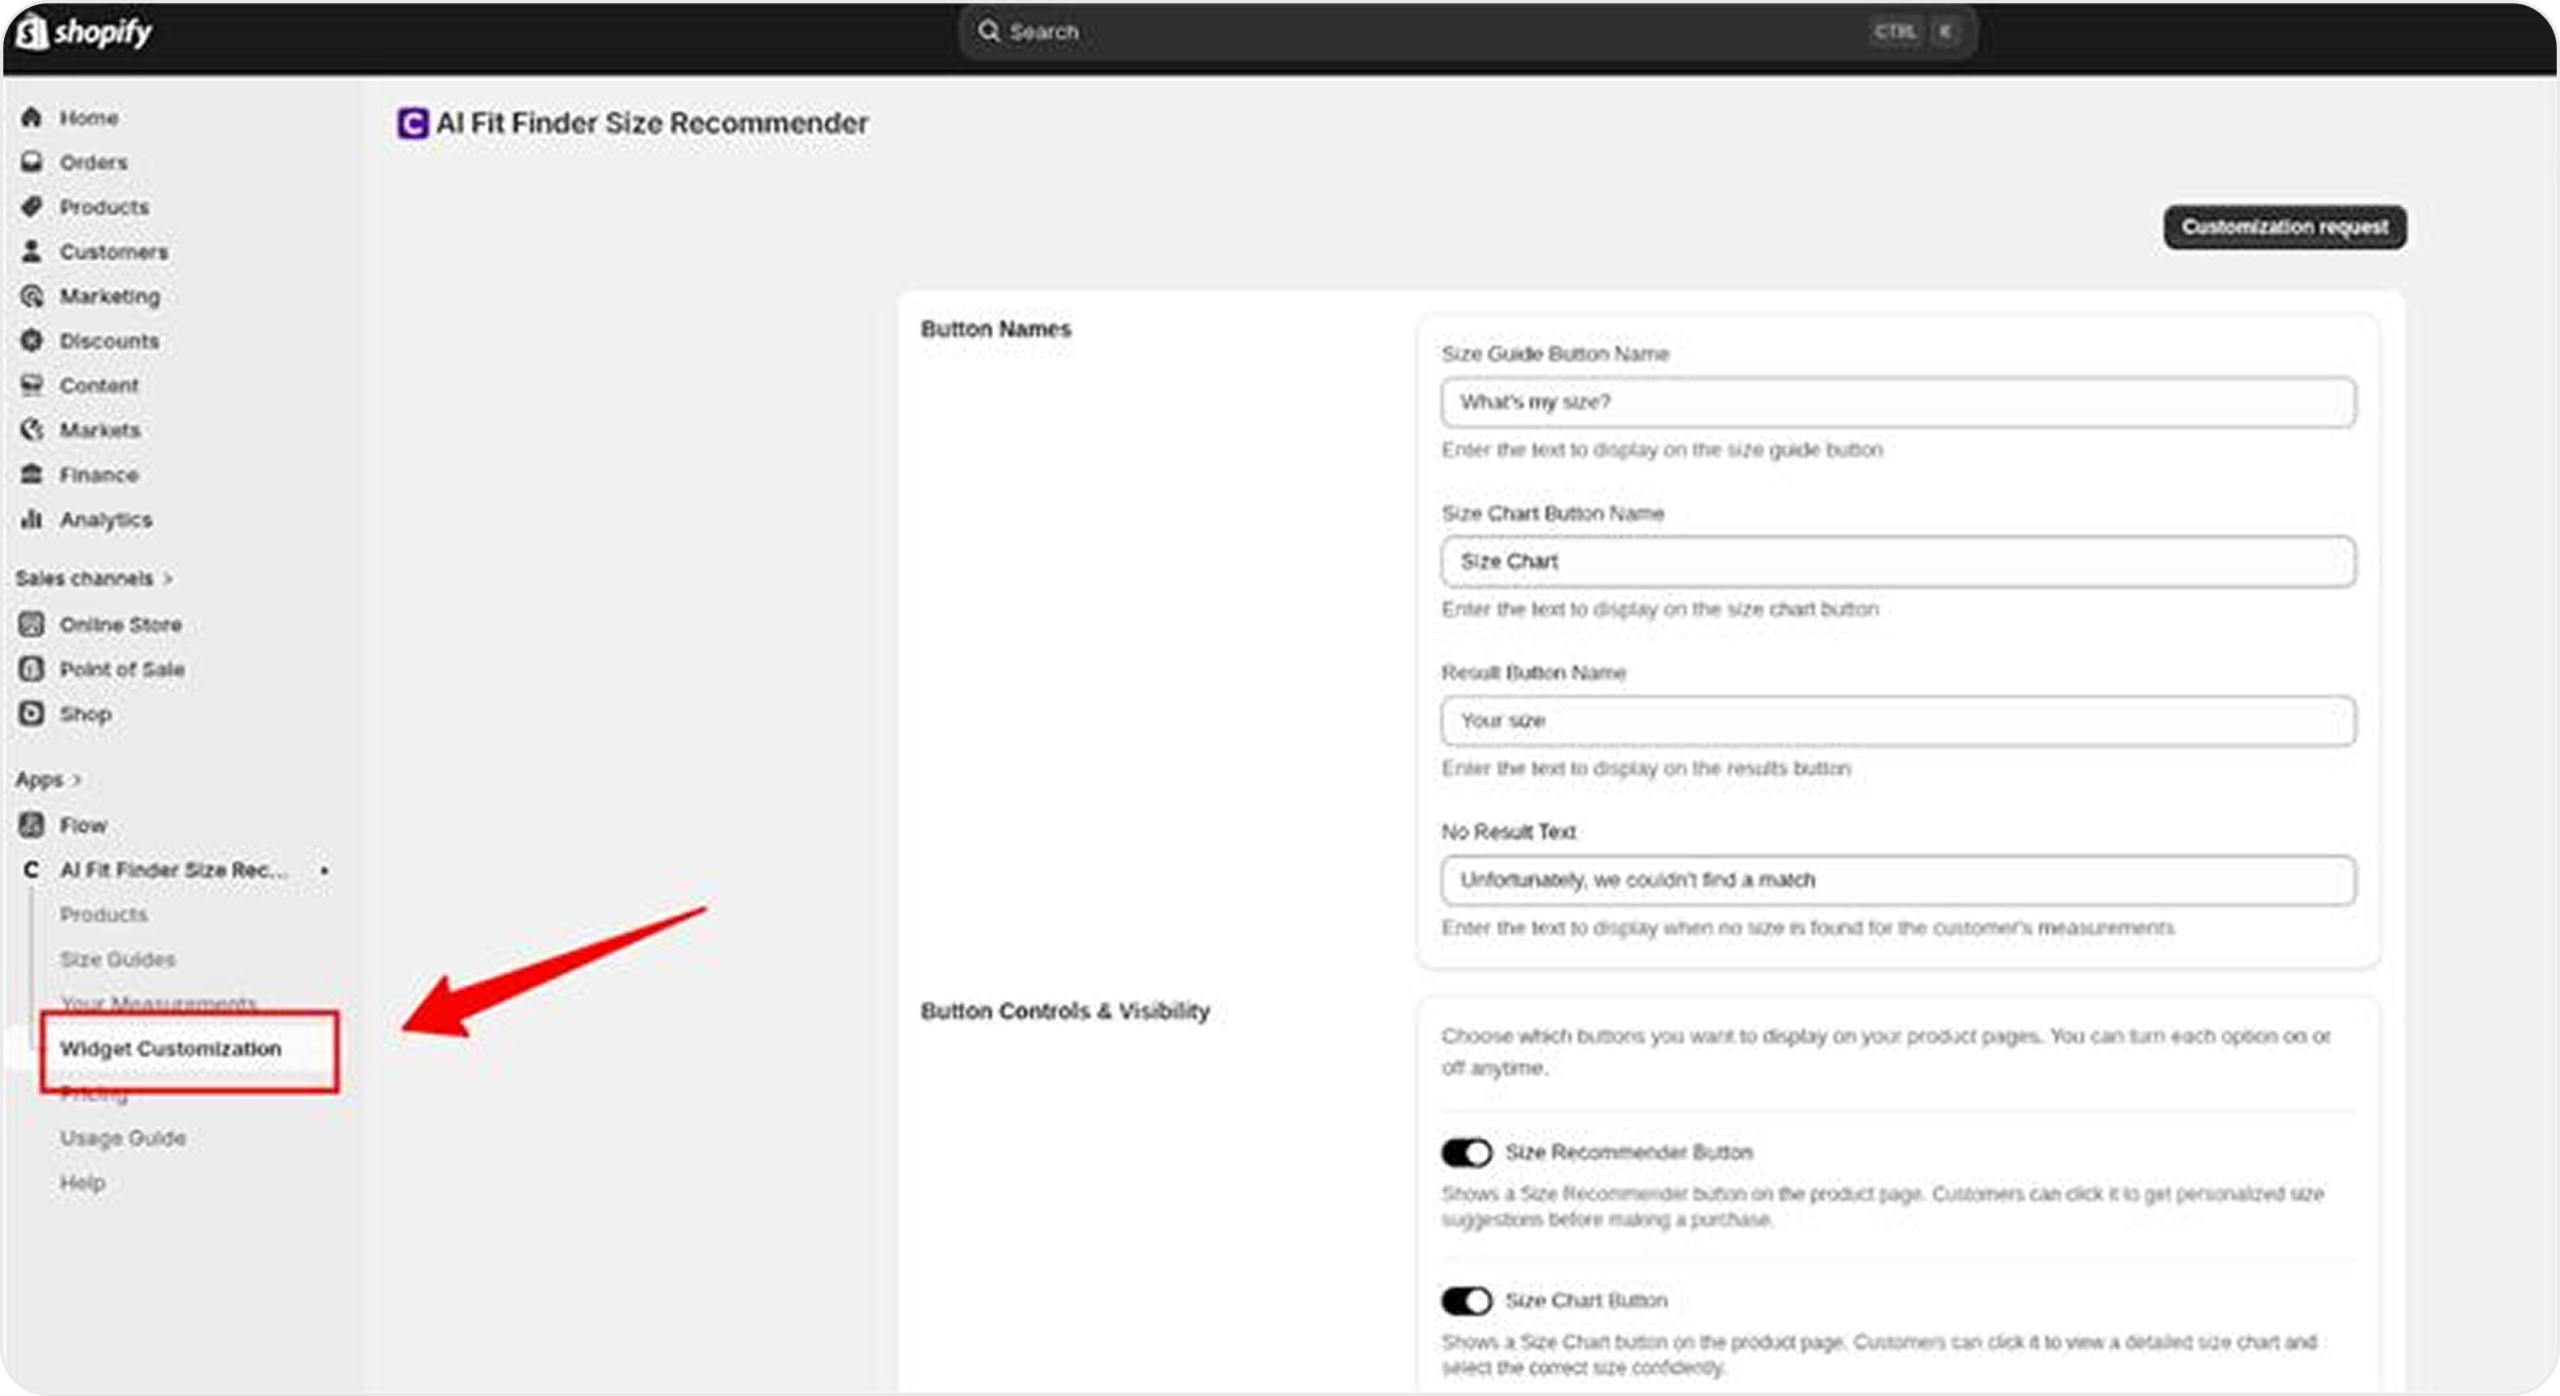
5. How to Customize the Widget
You can customize the widget from the Widget Customization section within the app. Easily adjust the design and styling options to match your store’s branding and create a seamless shopping experience.
6. Feedback & Feature Requests
Have an idea or need a new feature? Visit the Request Feature page to share your feedback. We carefully review all suggestions and prioritize the most requested features to continuously improve your experience.
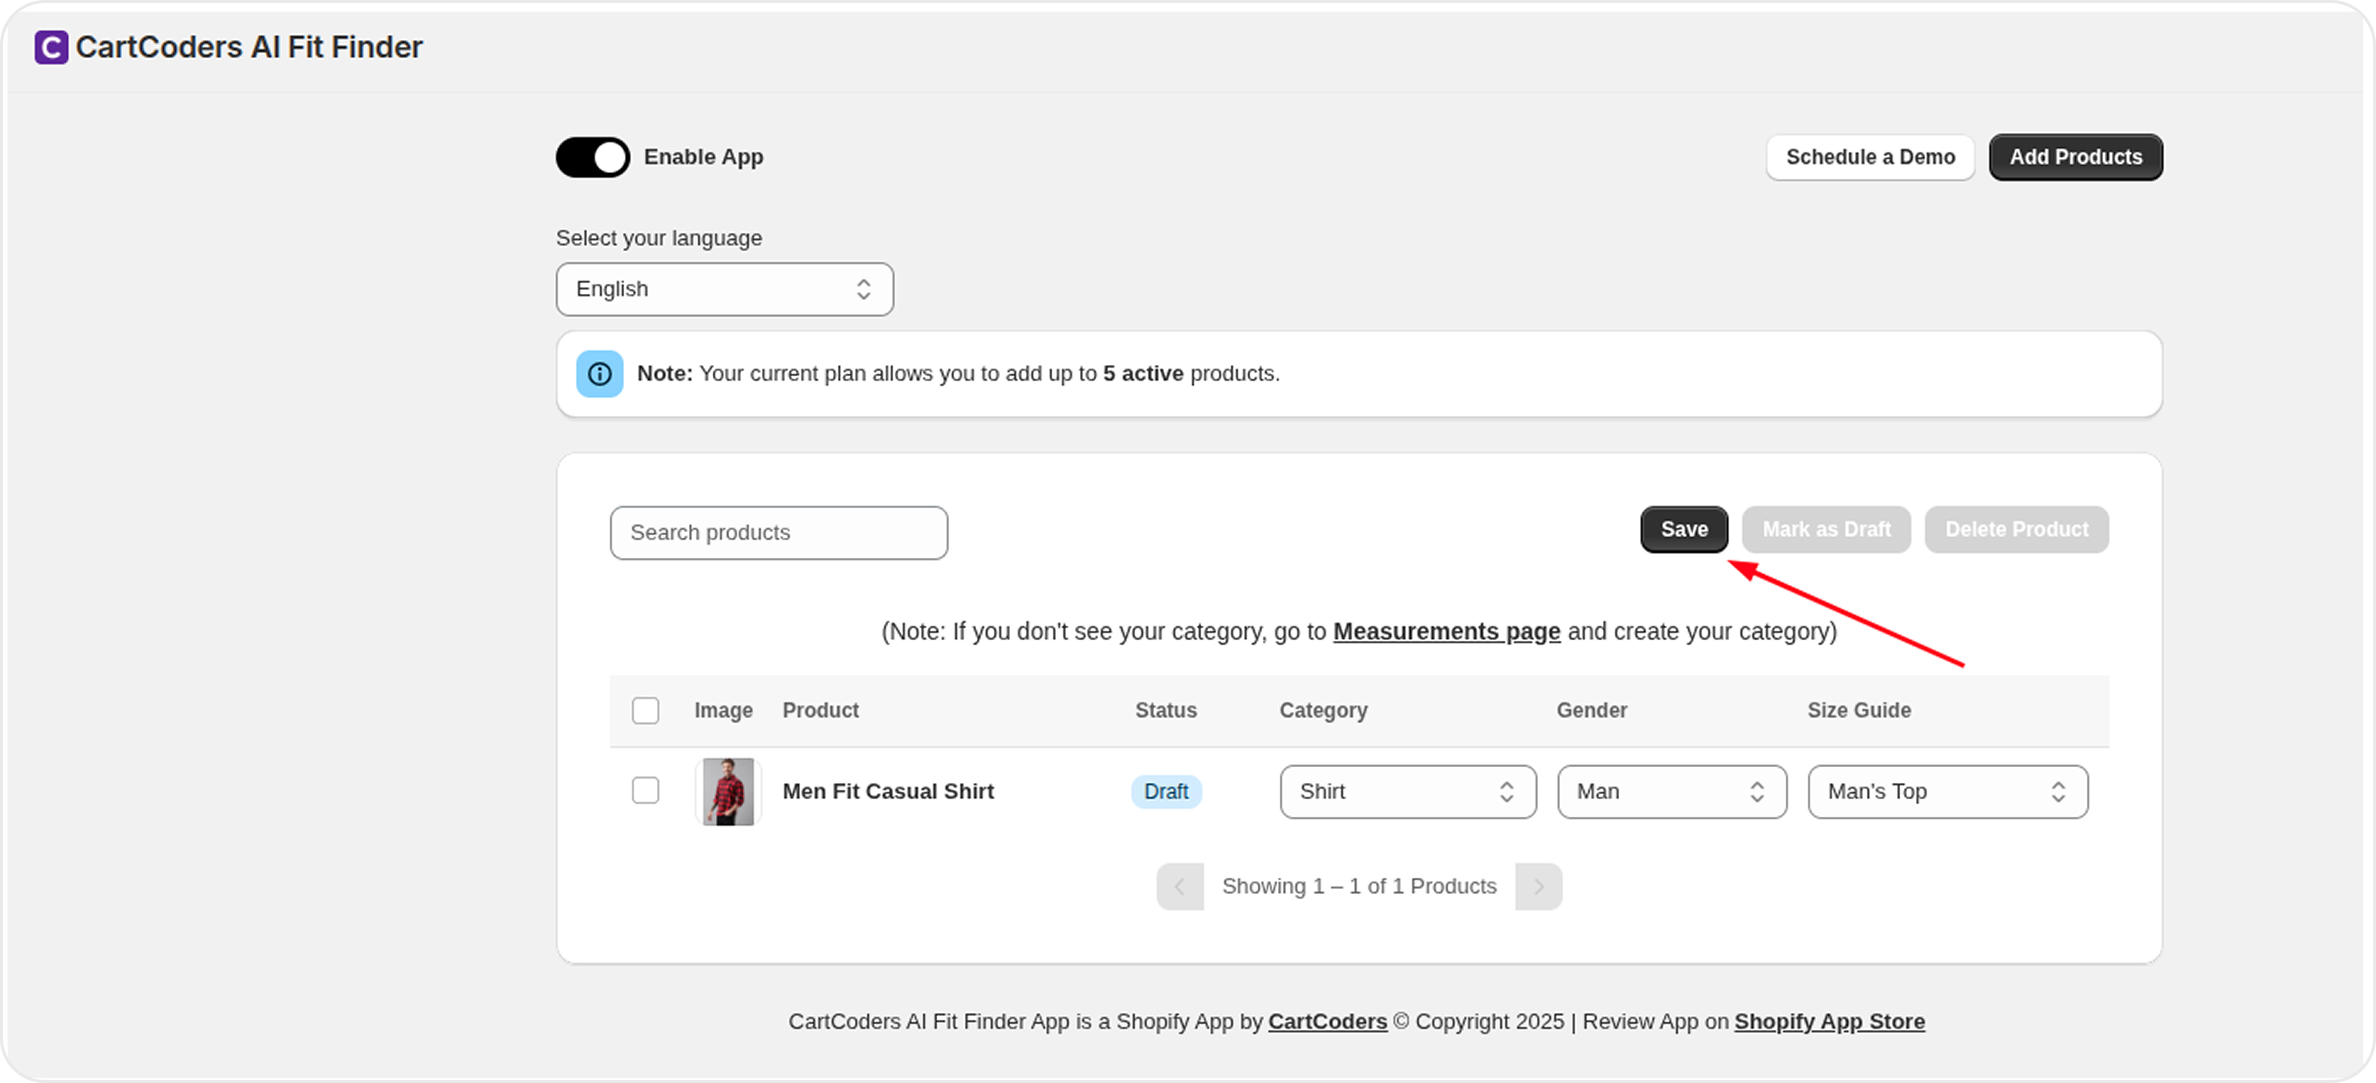
Saving, your selections will not be applied.
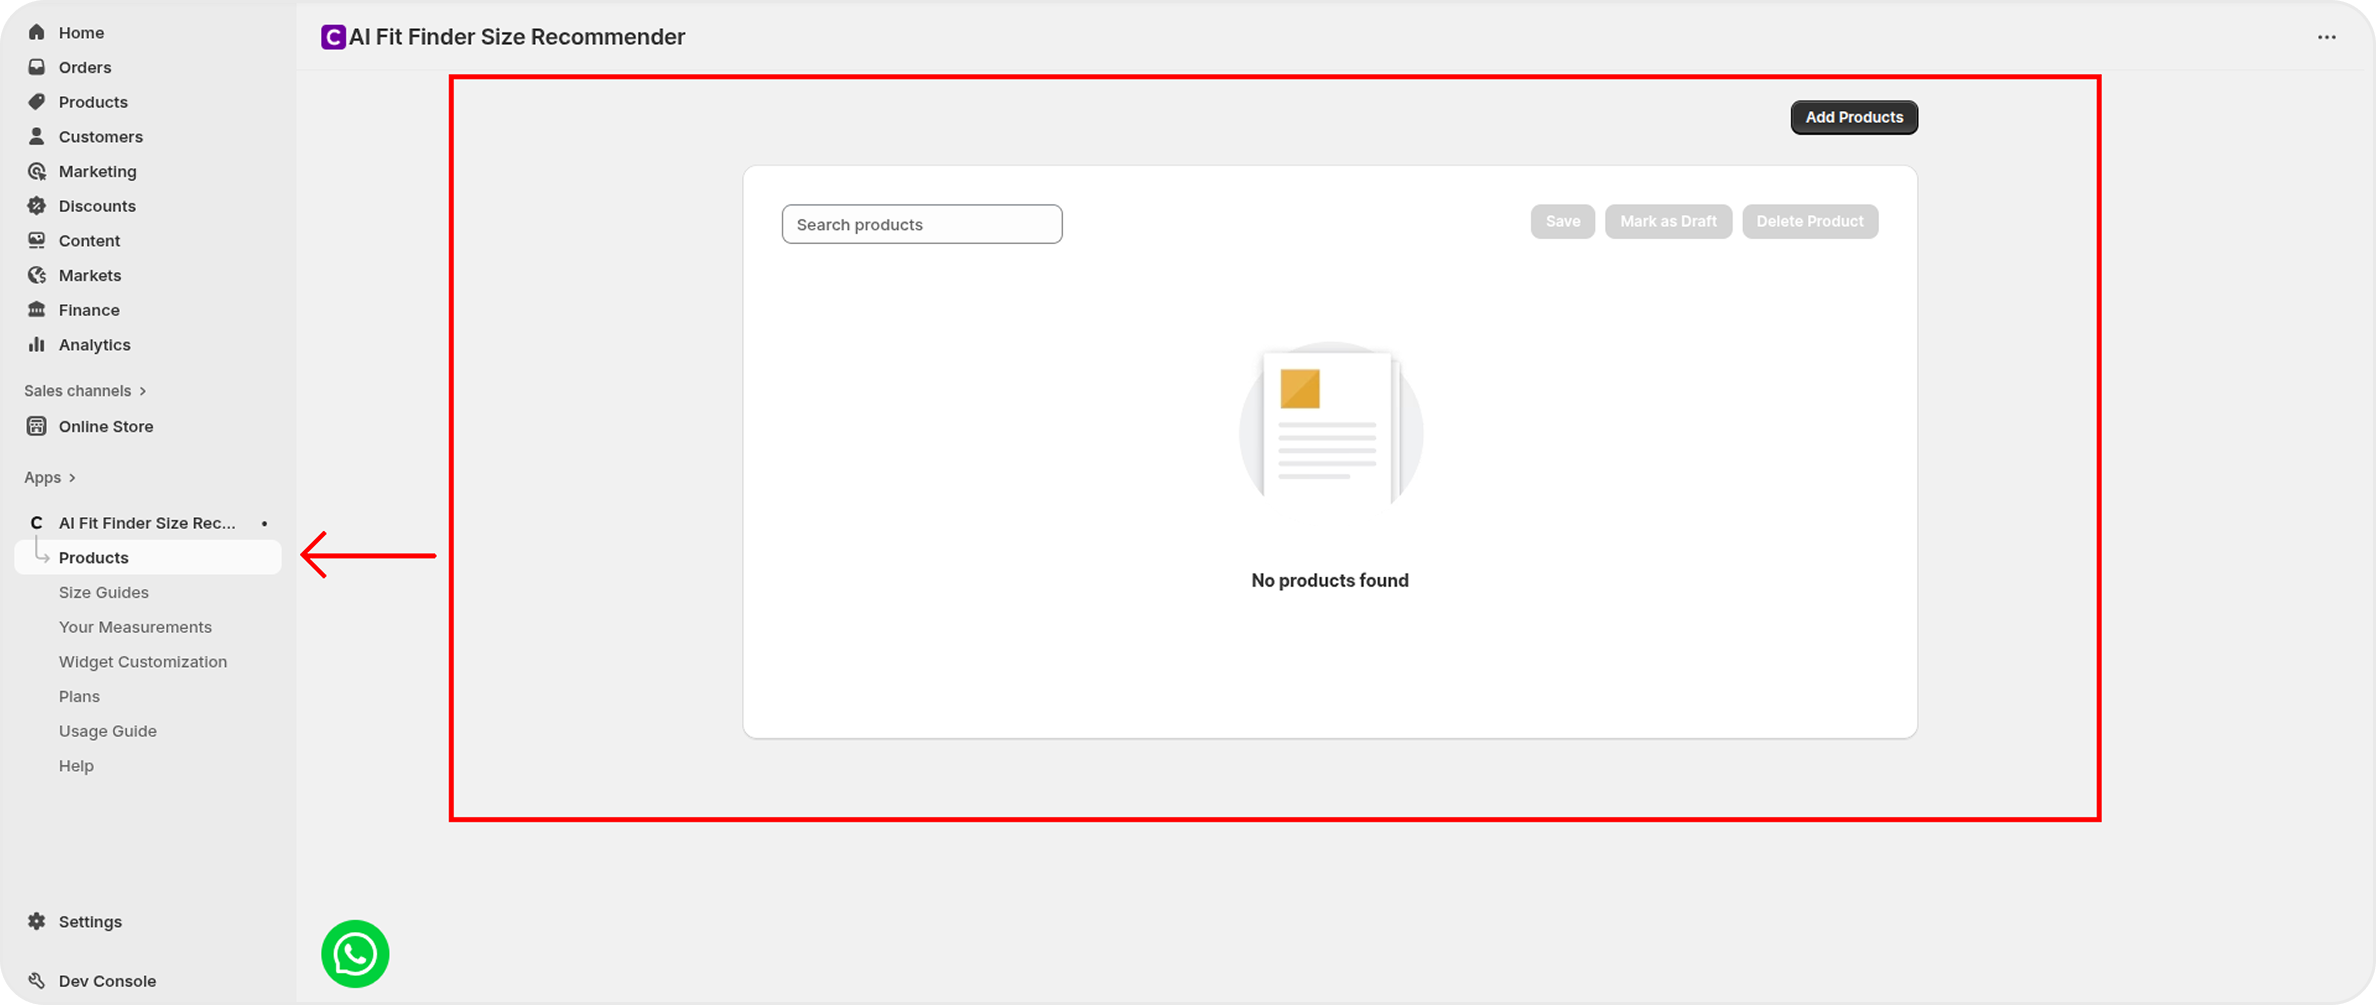
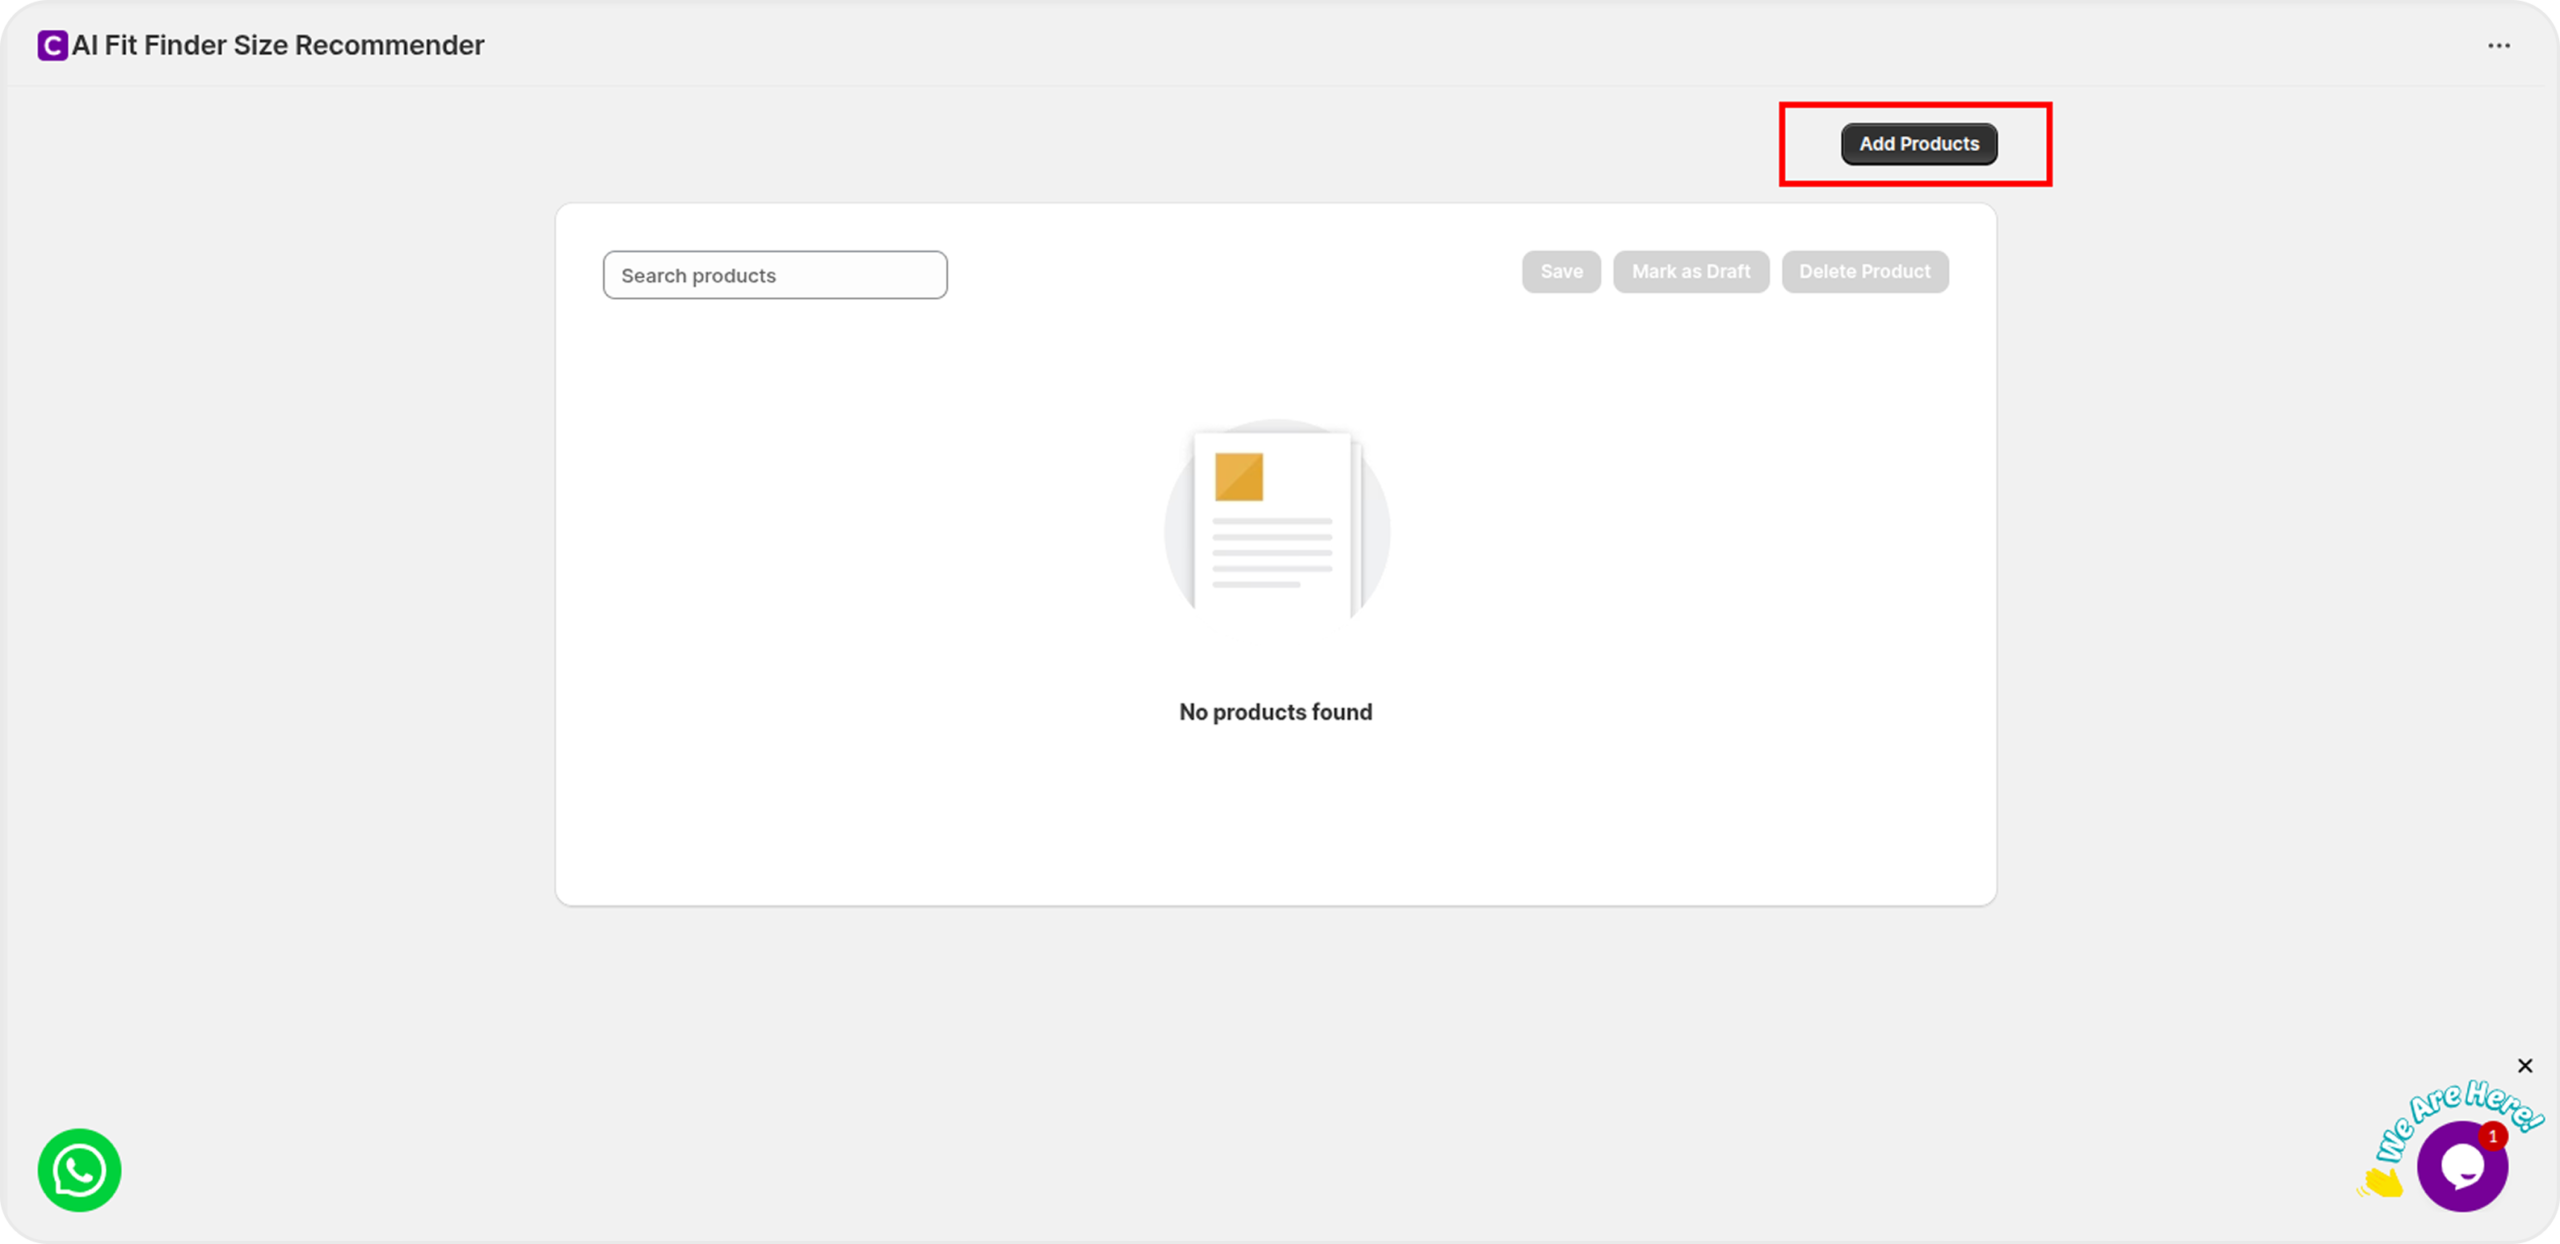
7. How to Add Products
Follow these simple steps to add products to the app:
Open the Dashboard
In your Shopify admin, click AI Fit Finder from the navigation menu to access the app dashboard.
Click “Add Product”
On the top-right corner of the dashboard, click the Add Product button.
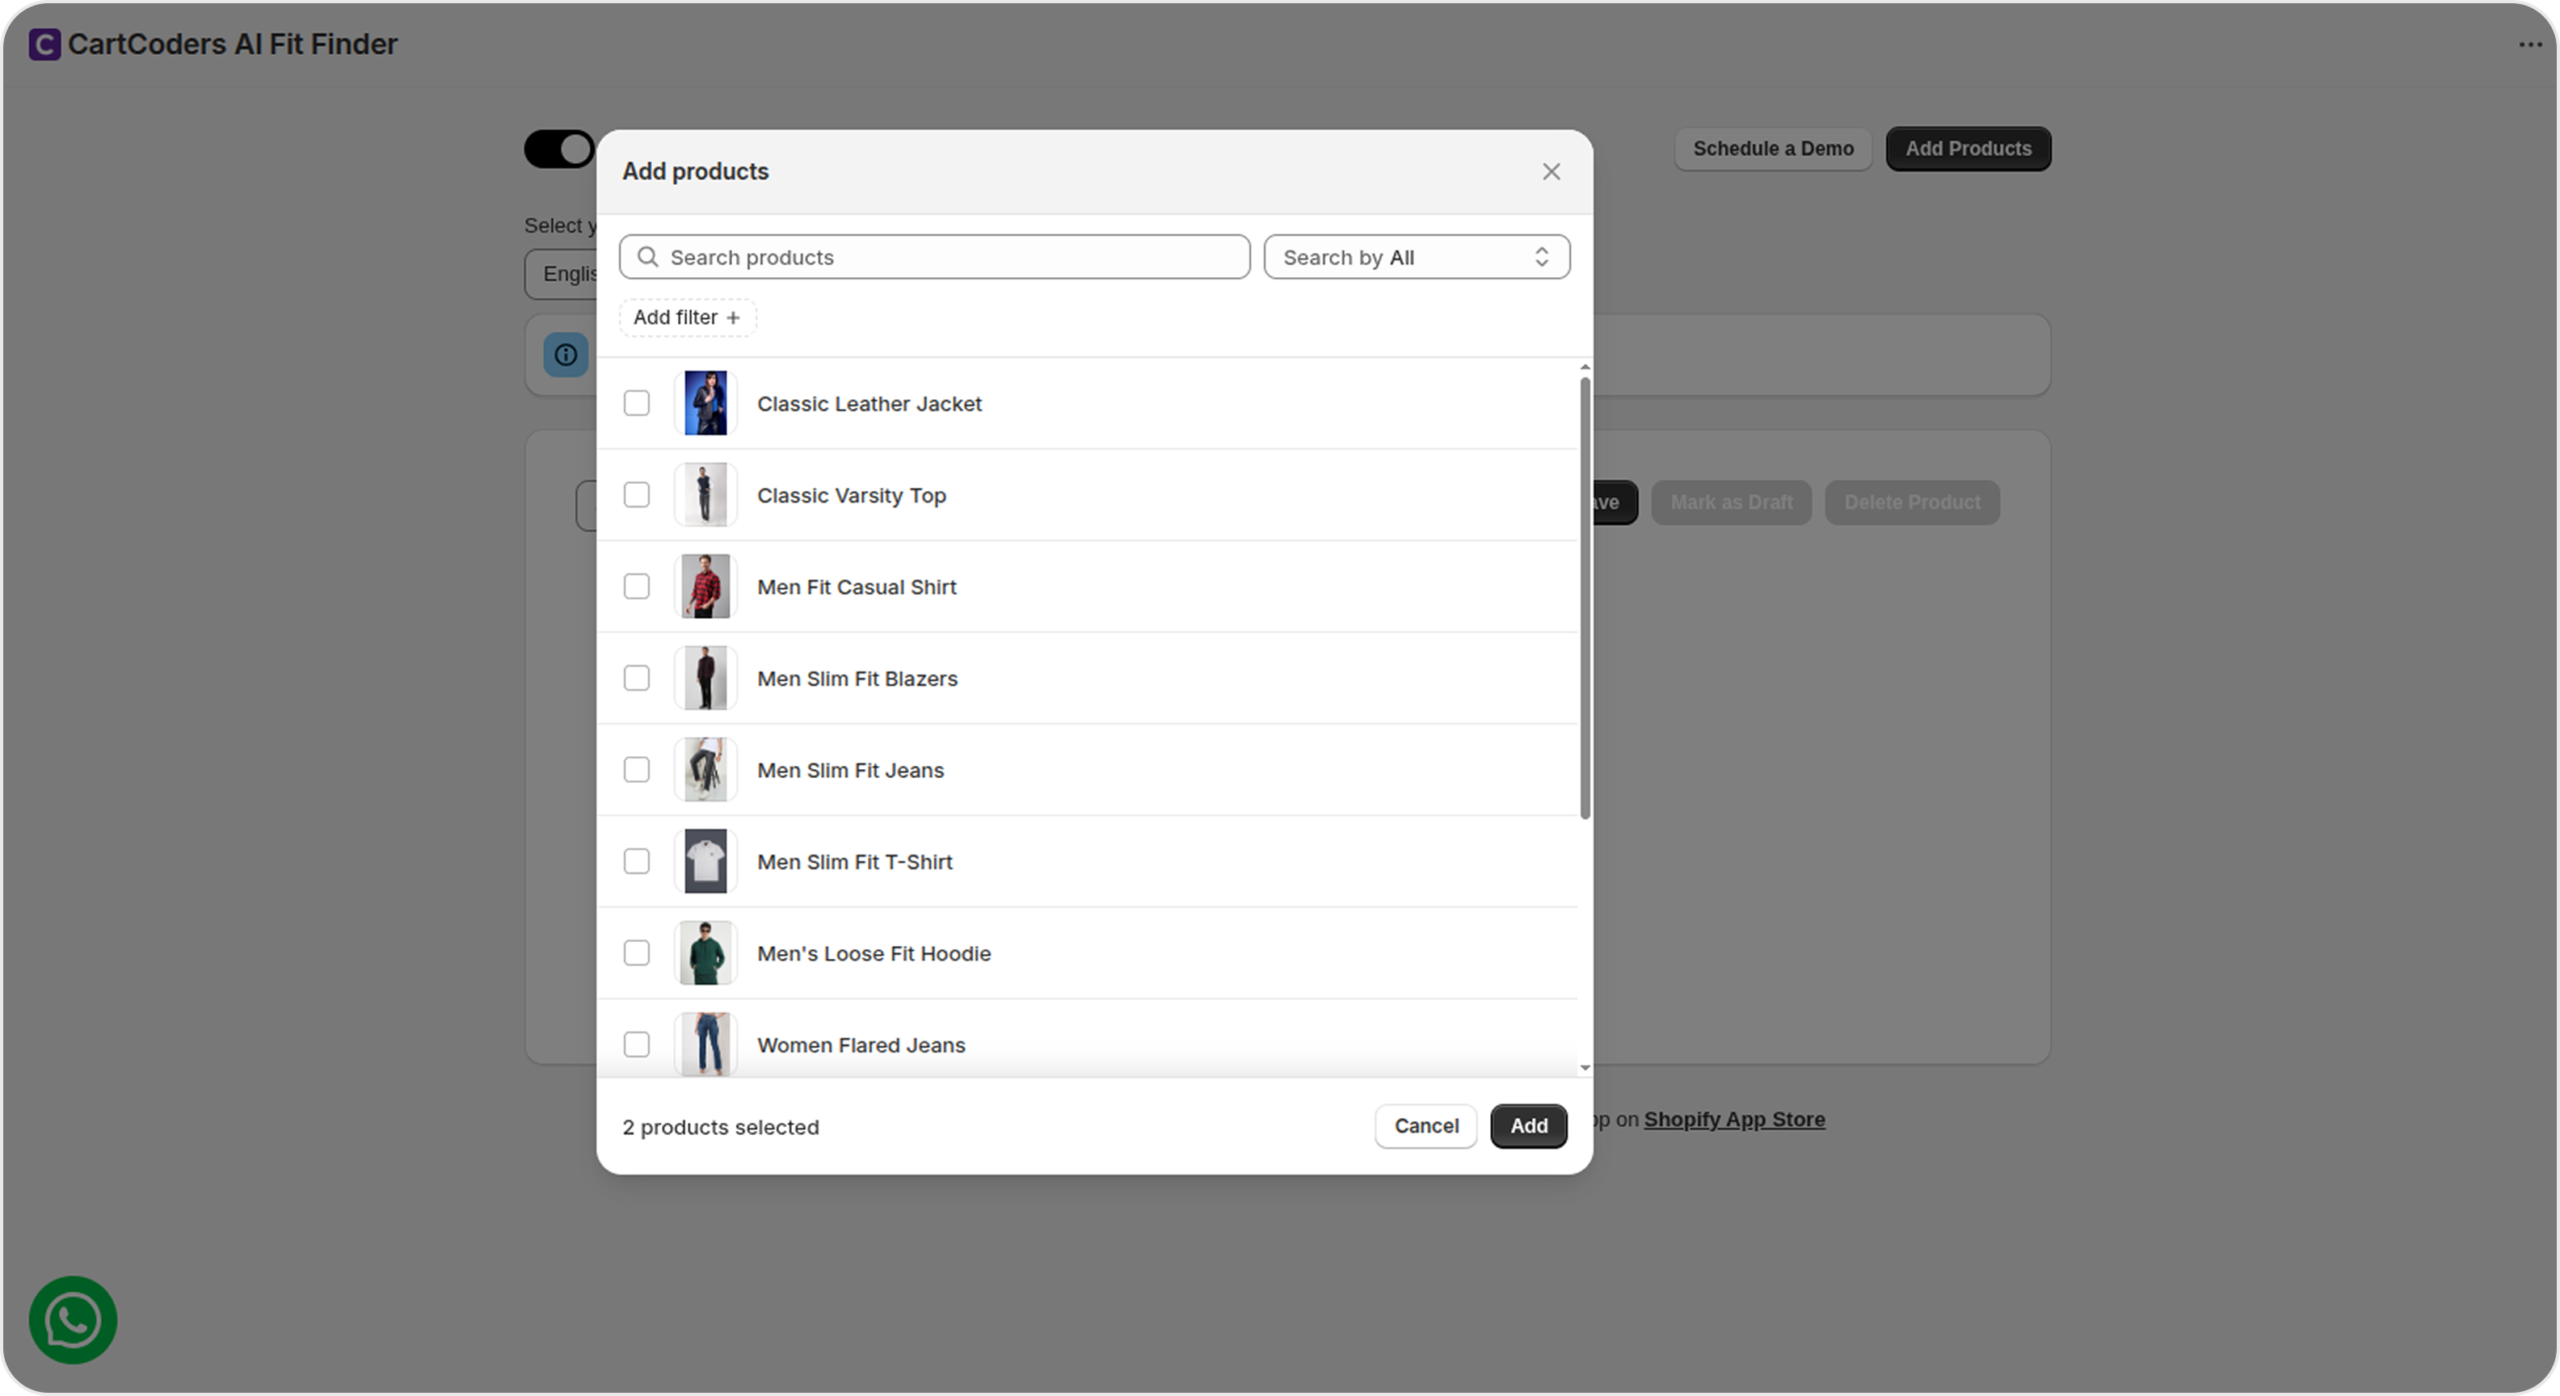
Select Products
A popup will display all available products in your store.
Check the box next to the products you want to add, then click Add.
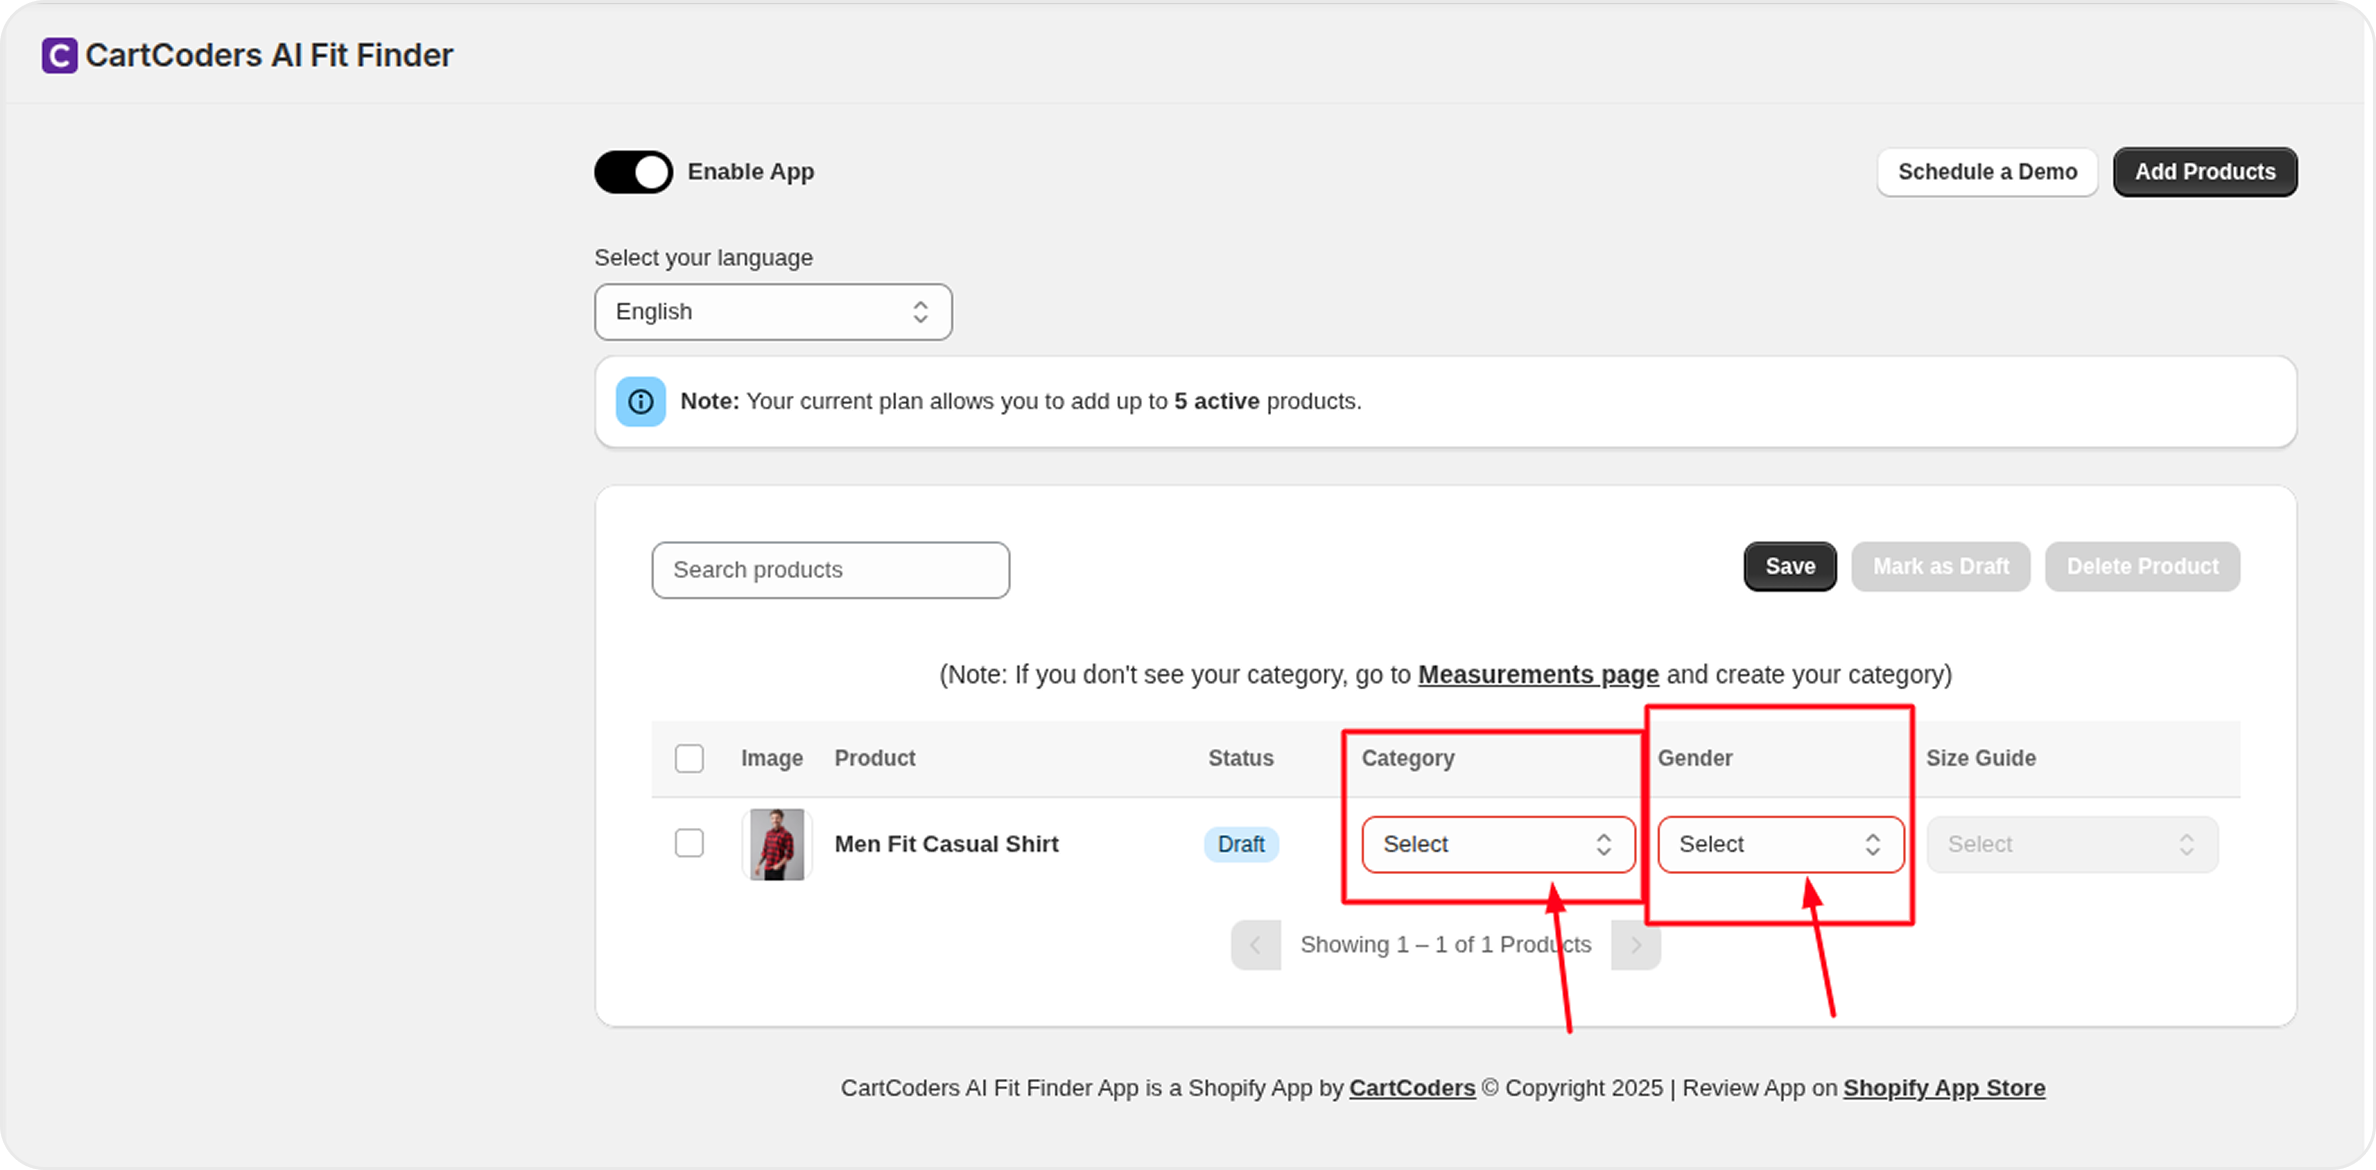
Assign Category & Gender
For each selected product, choose the appropriate Category and Gender.
This step is mandatory to activate the product within the app.
Save Changes
Click the Save button to apply your changes.
If you don’t save, the products will not be activated.
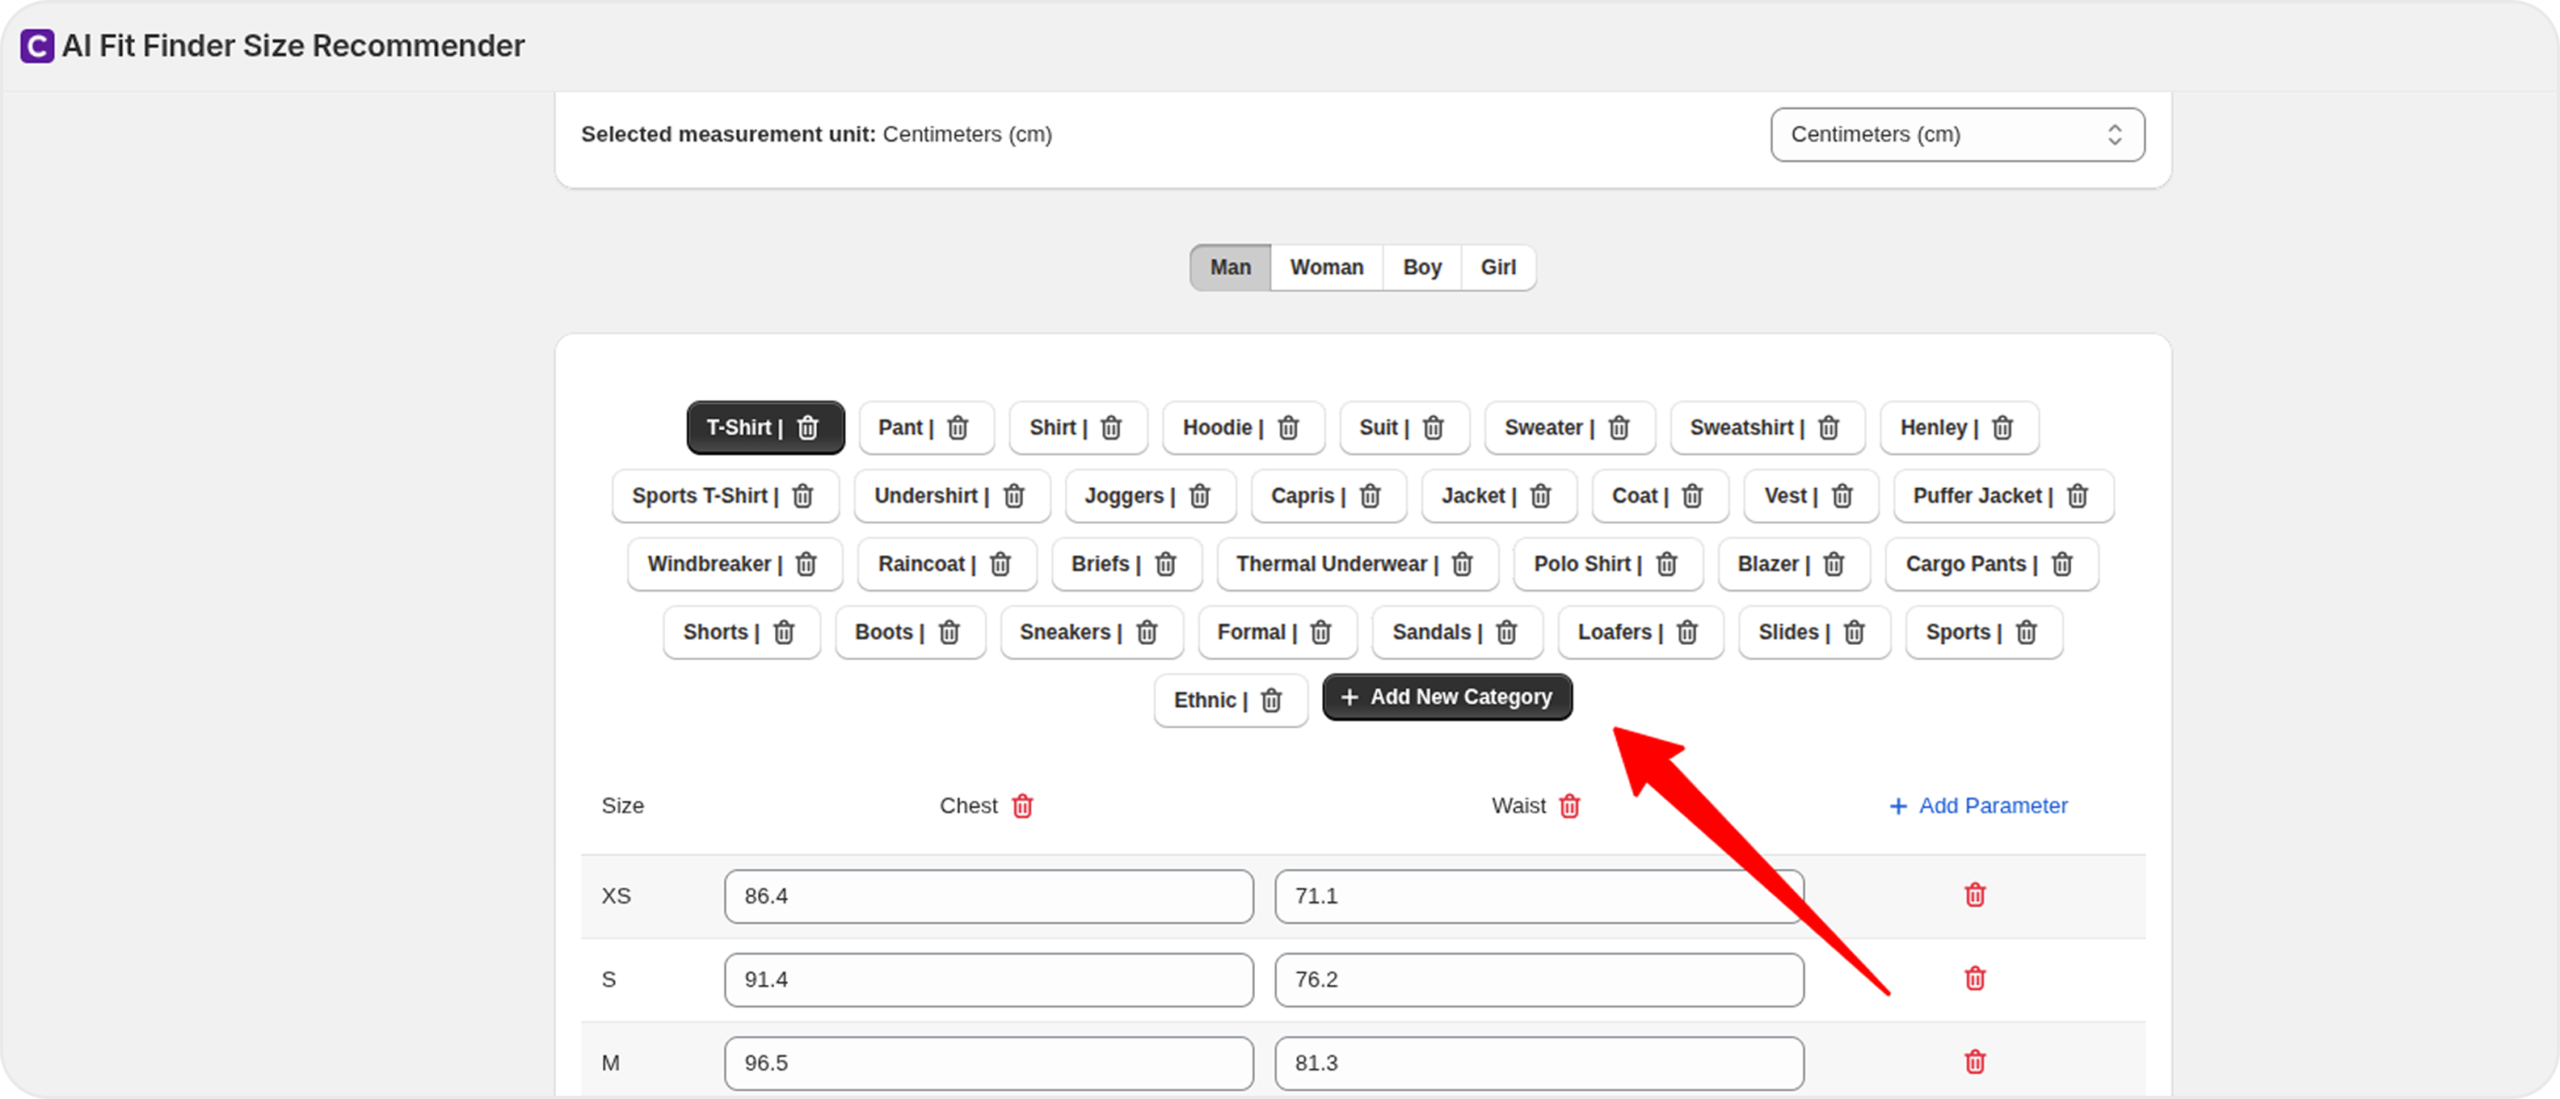
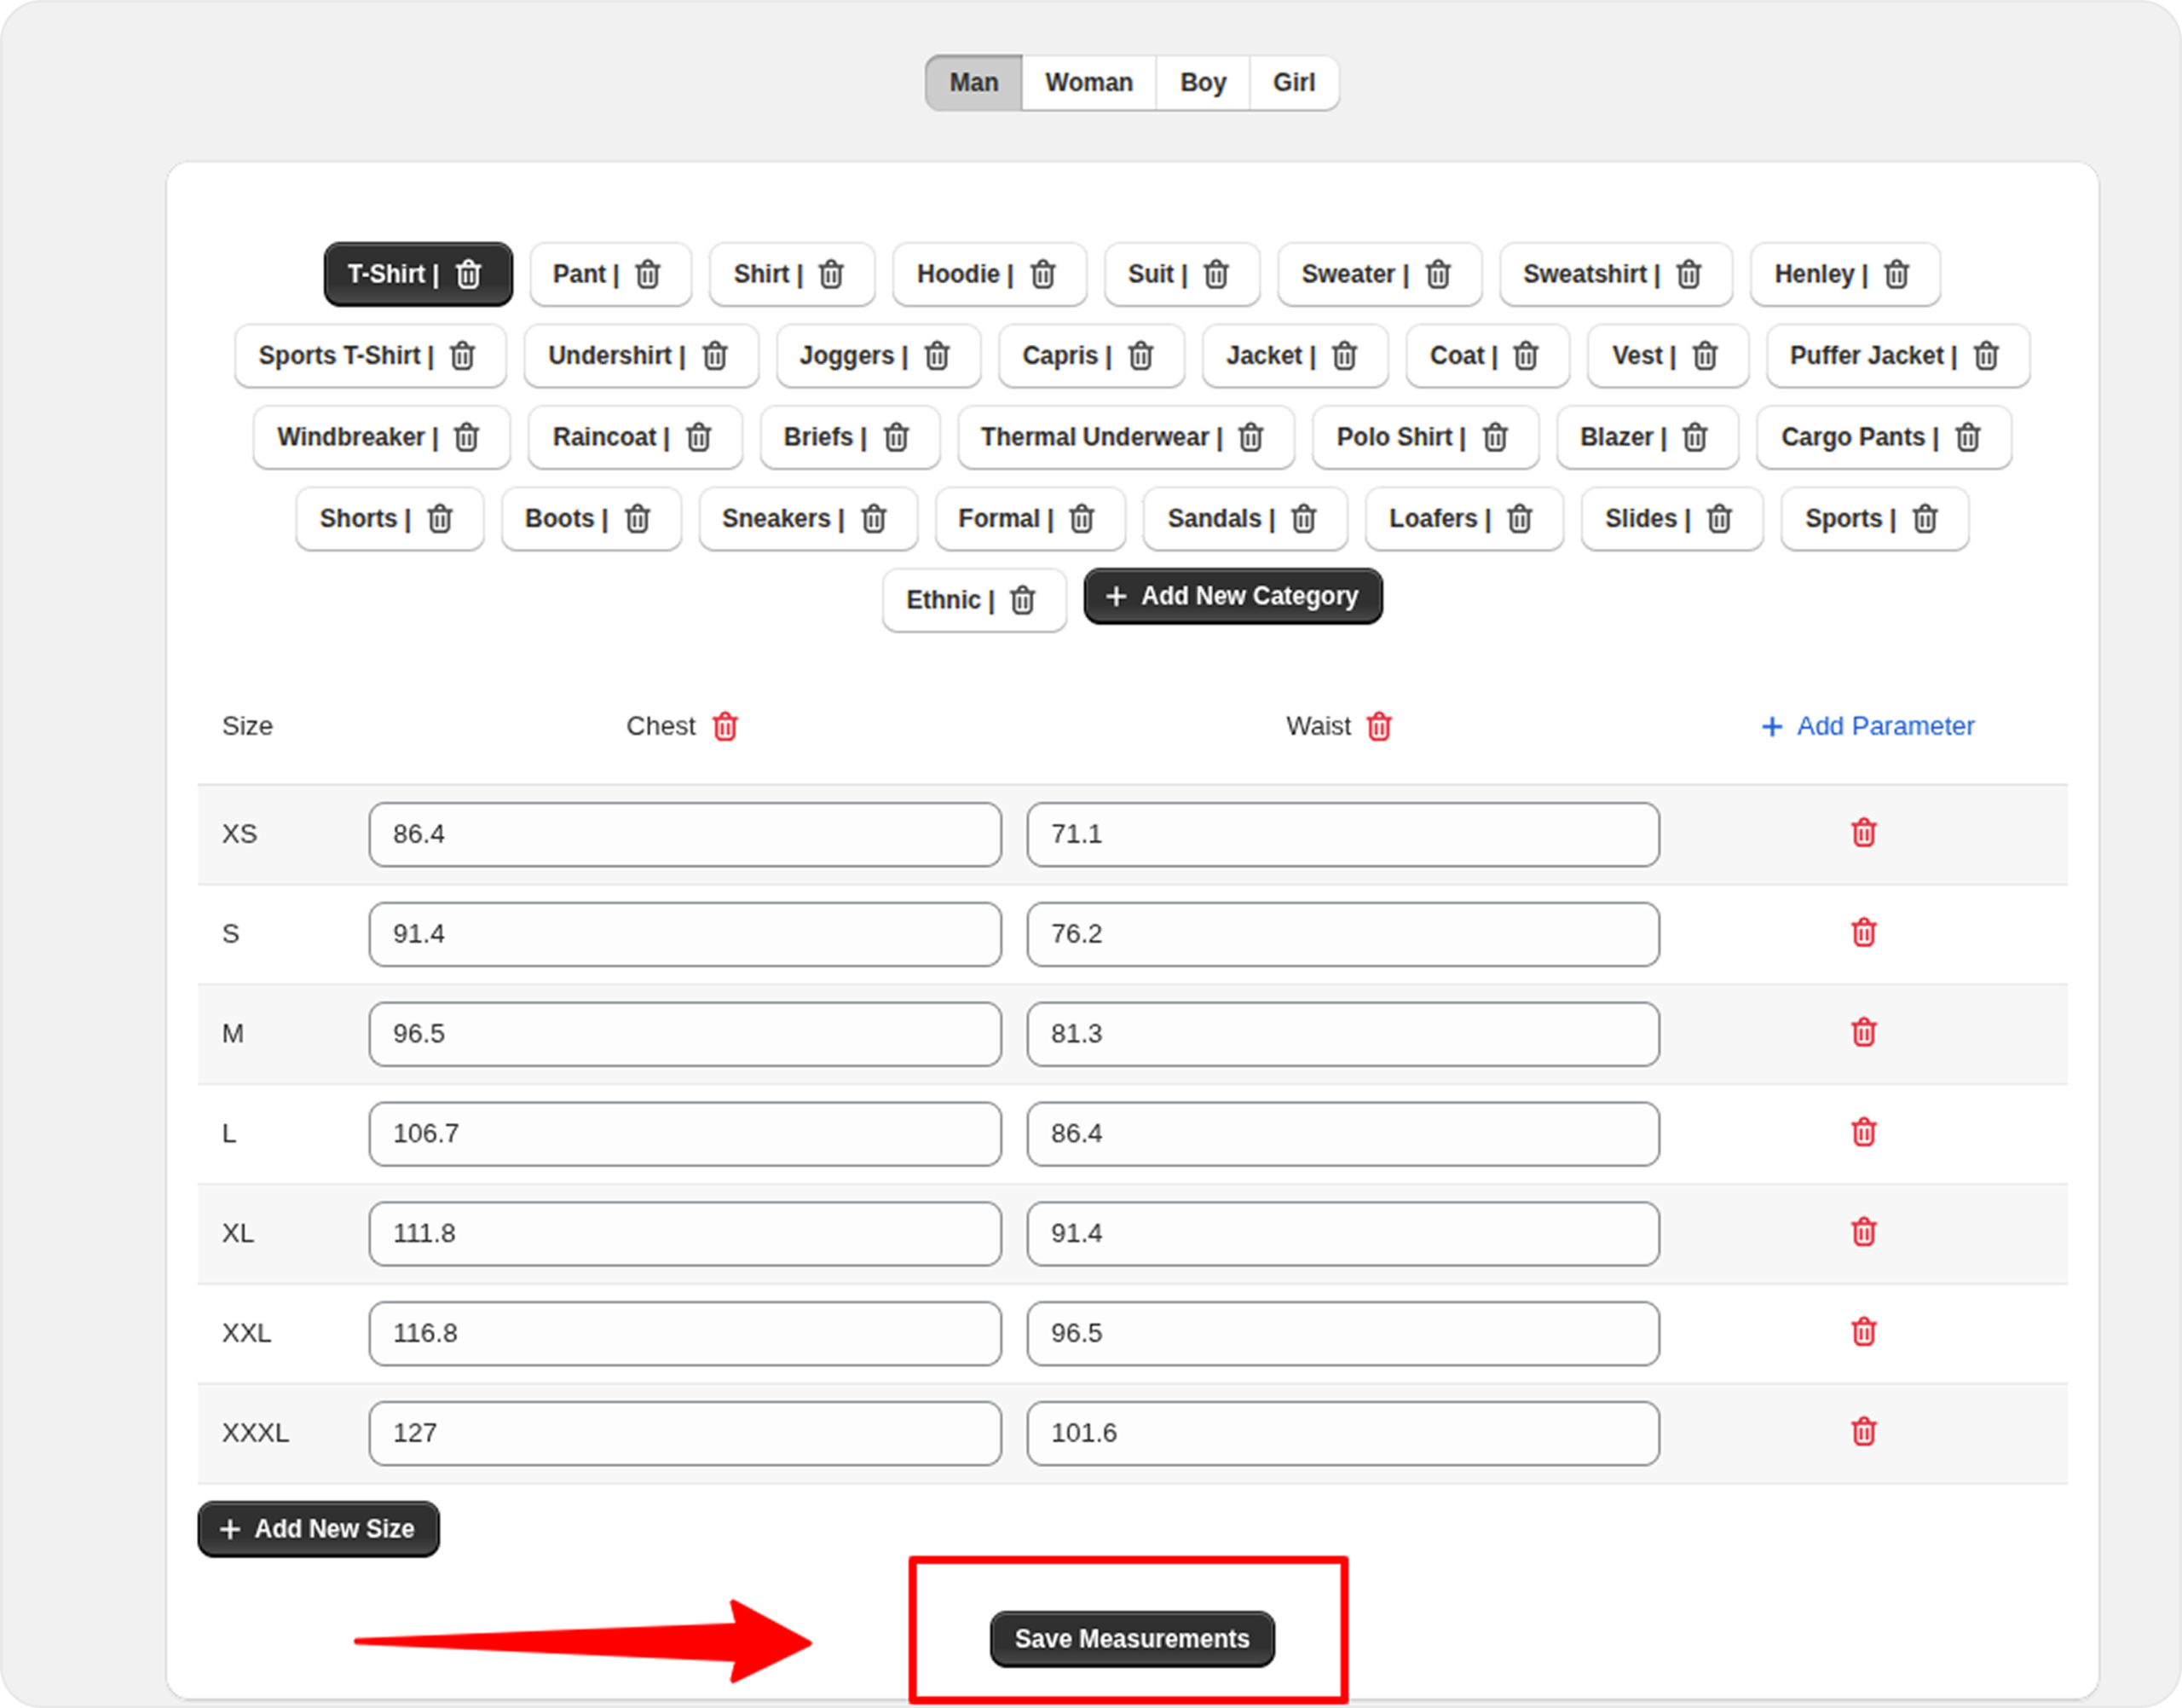
8. Add / Update Measurements & Assign Categories
Follow these steps to manage measurements and assign categories for your size guides:
A. Navigate to Measurements
1. Open the app and go to the Measurements section.
2. Here, you will see default global measurements for:
Each gender includes predefined categories such as Shirt, Pants, T-Shirt, Suit, etc.
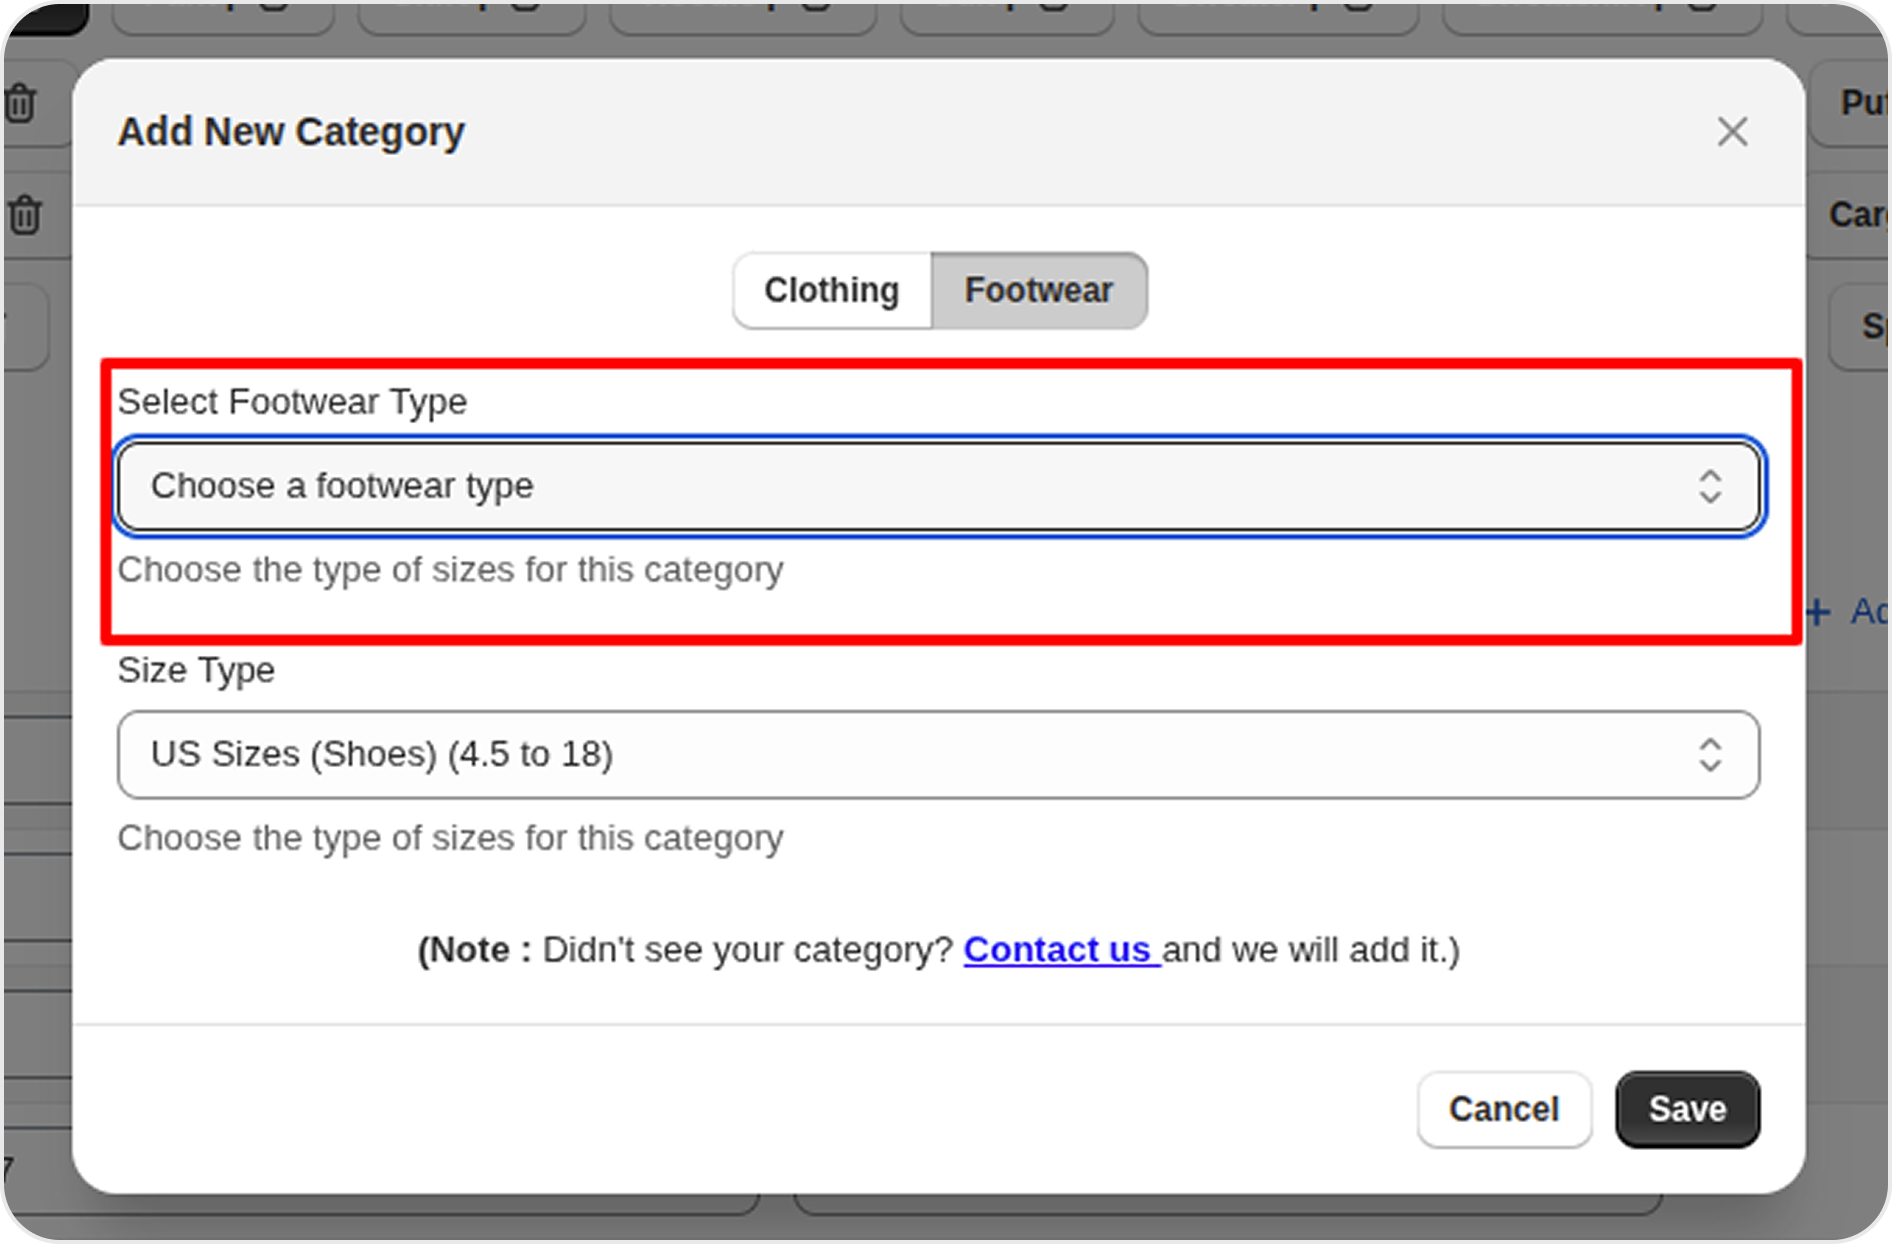
B. Create a New Category
1. Click on Create Category.
2. Select the category type:
4. Add measurement parameters (e.g., chest, waist, foot length).
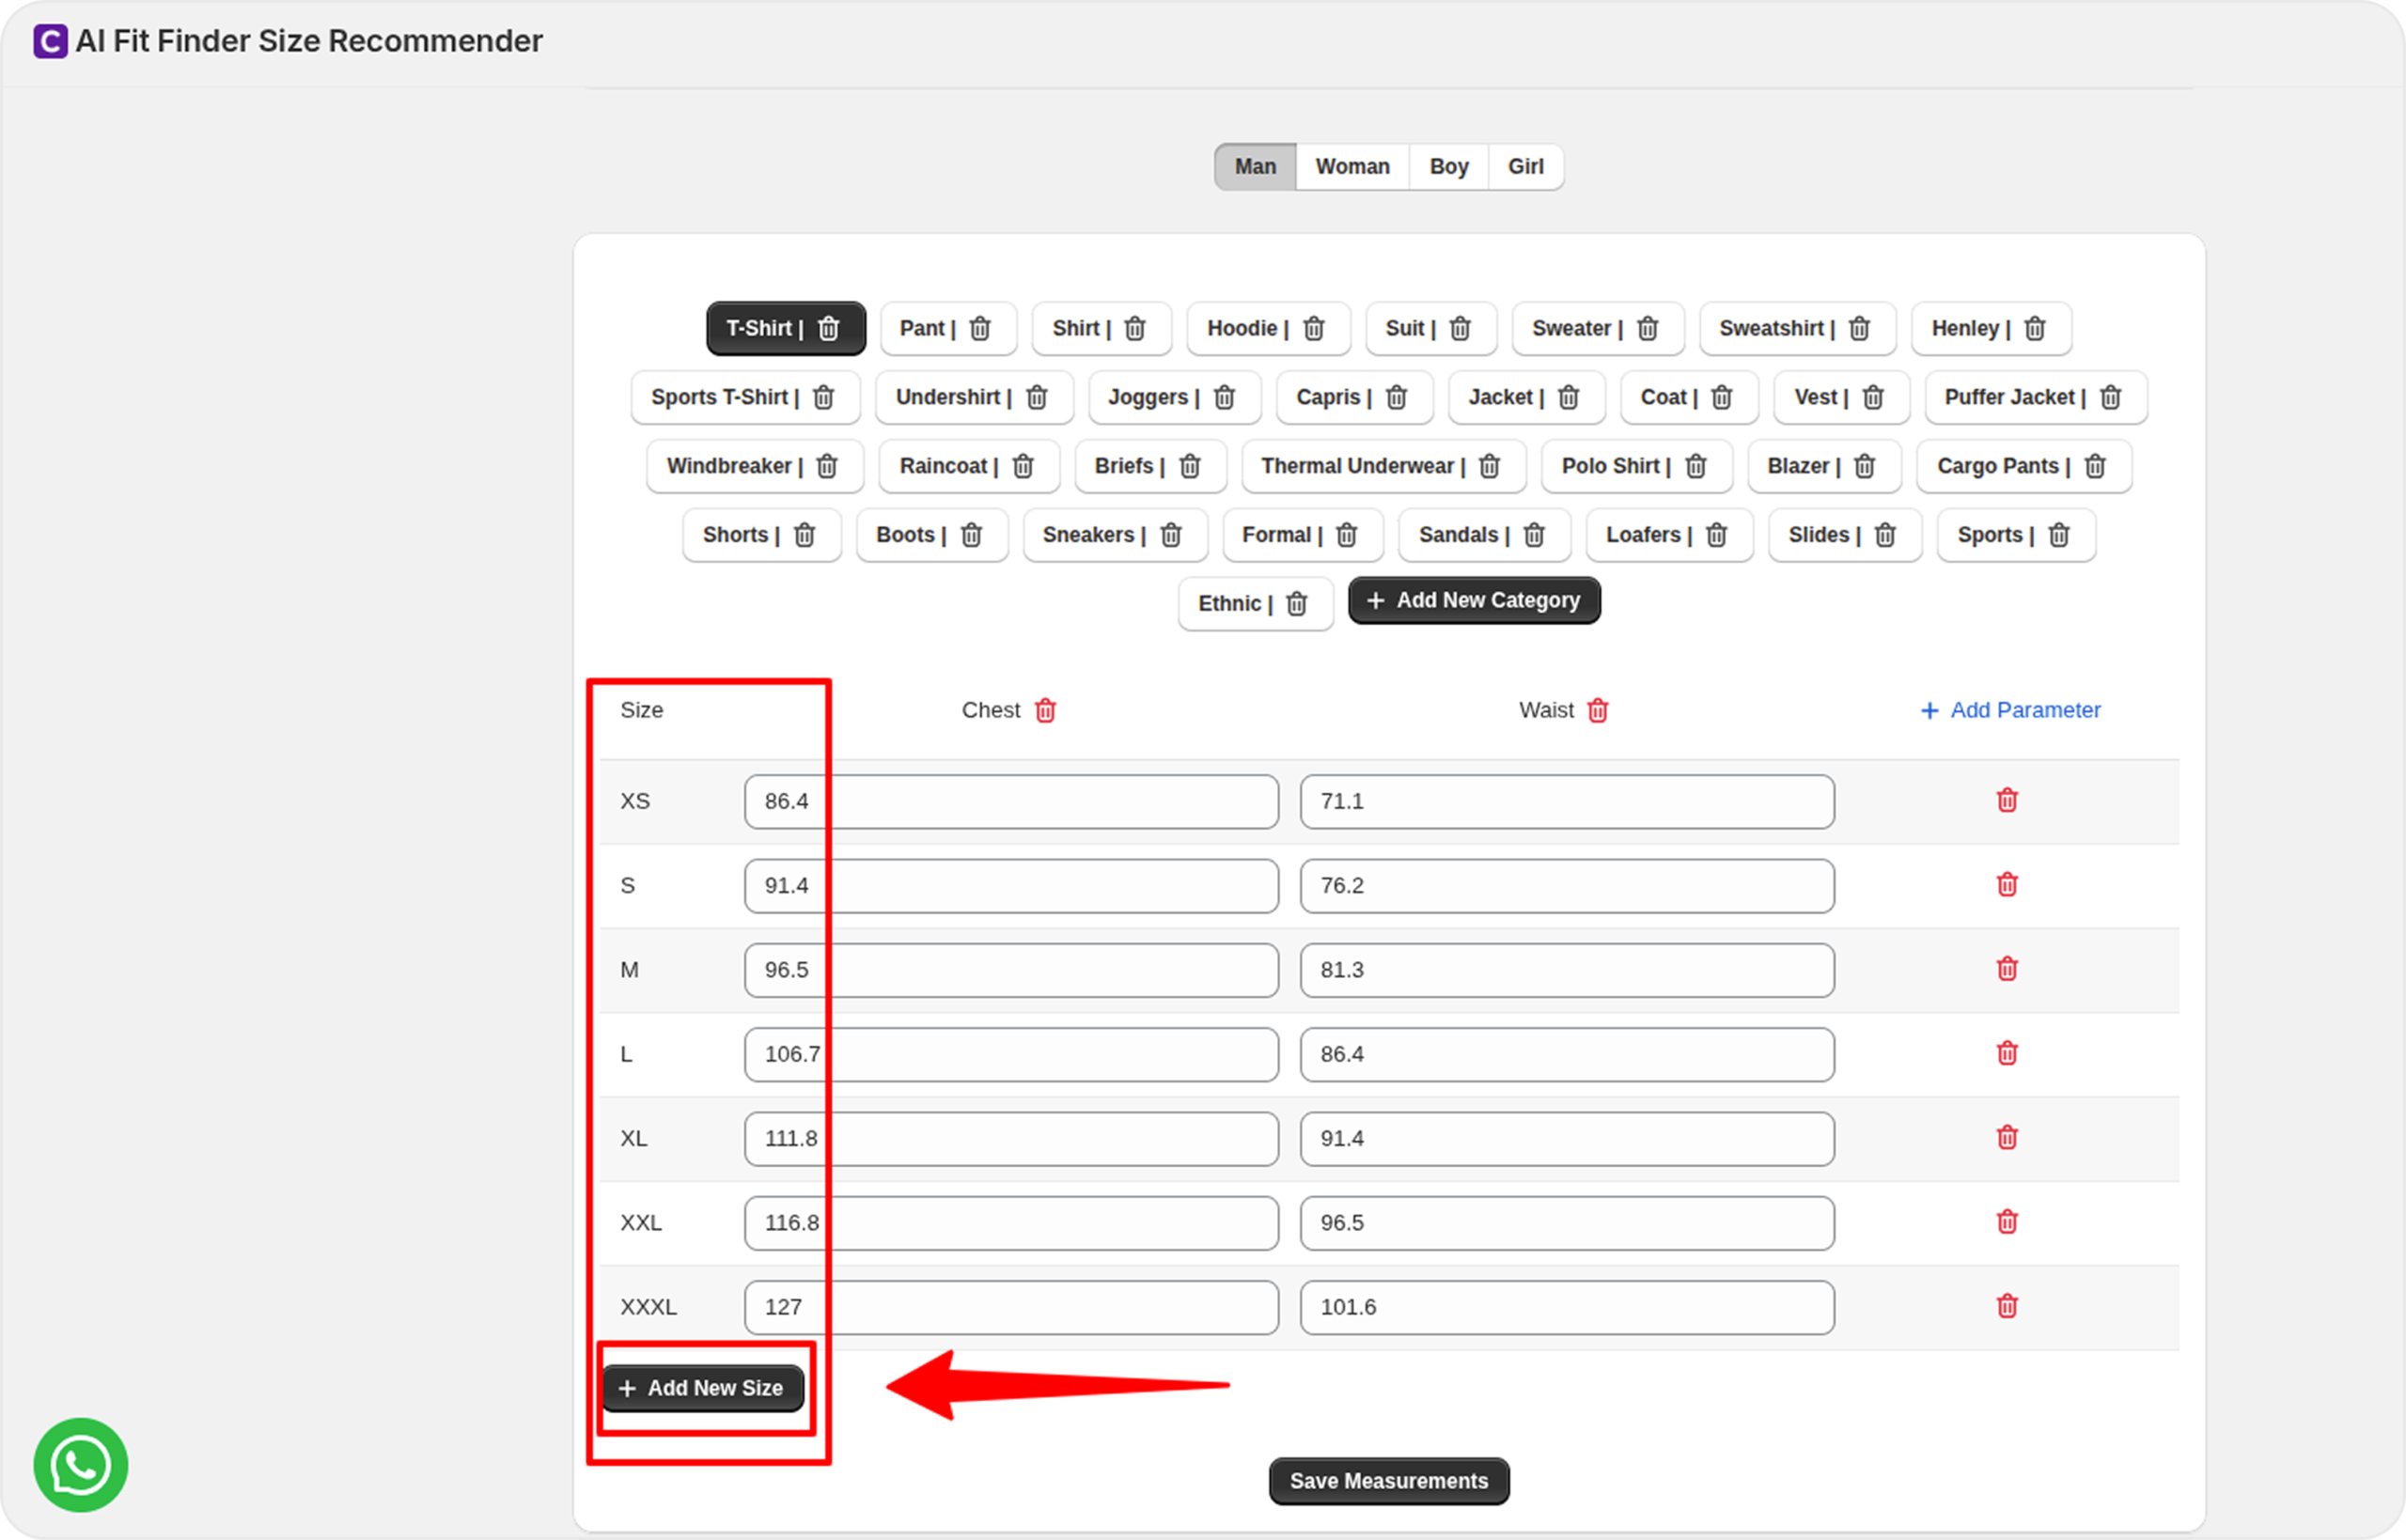
5. Add sizes and corresponding values.
6. Click Save to create the category.
C. Update Existing Measurements
1. Select a gender and category.
2. Edit measurement values (e.g., chest, waist, length) as needed.
3. Add or modify sizes based on your requirements.
4. Click Save to update the measurements.
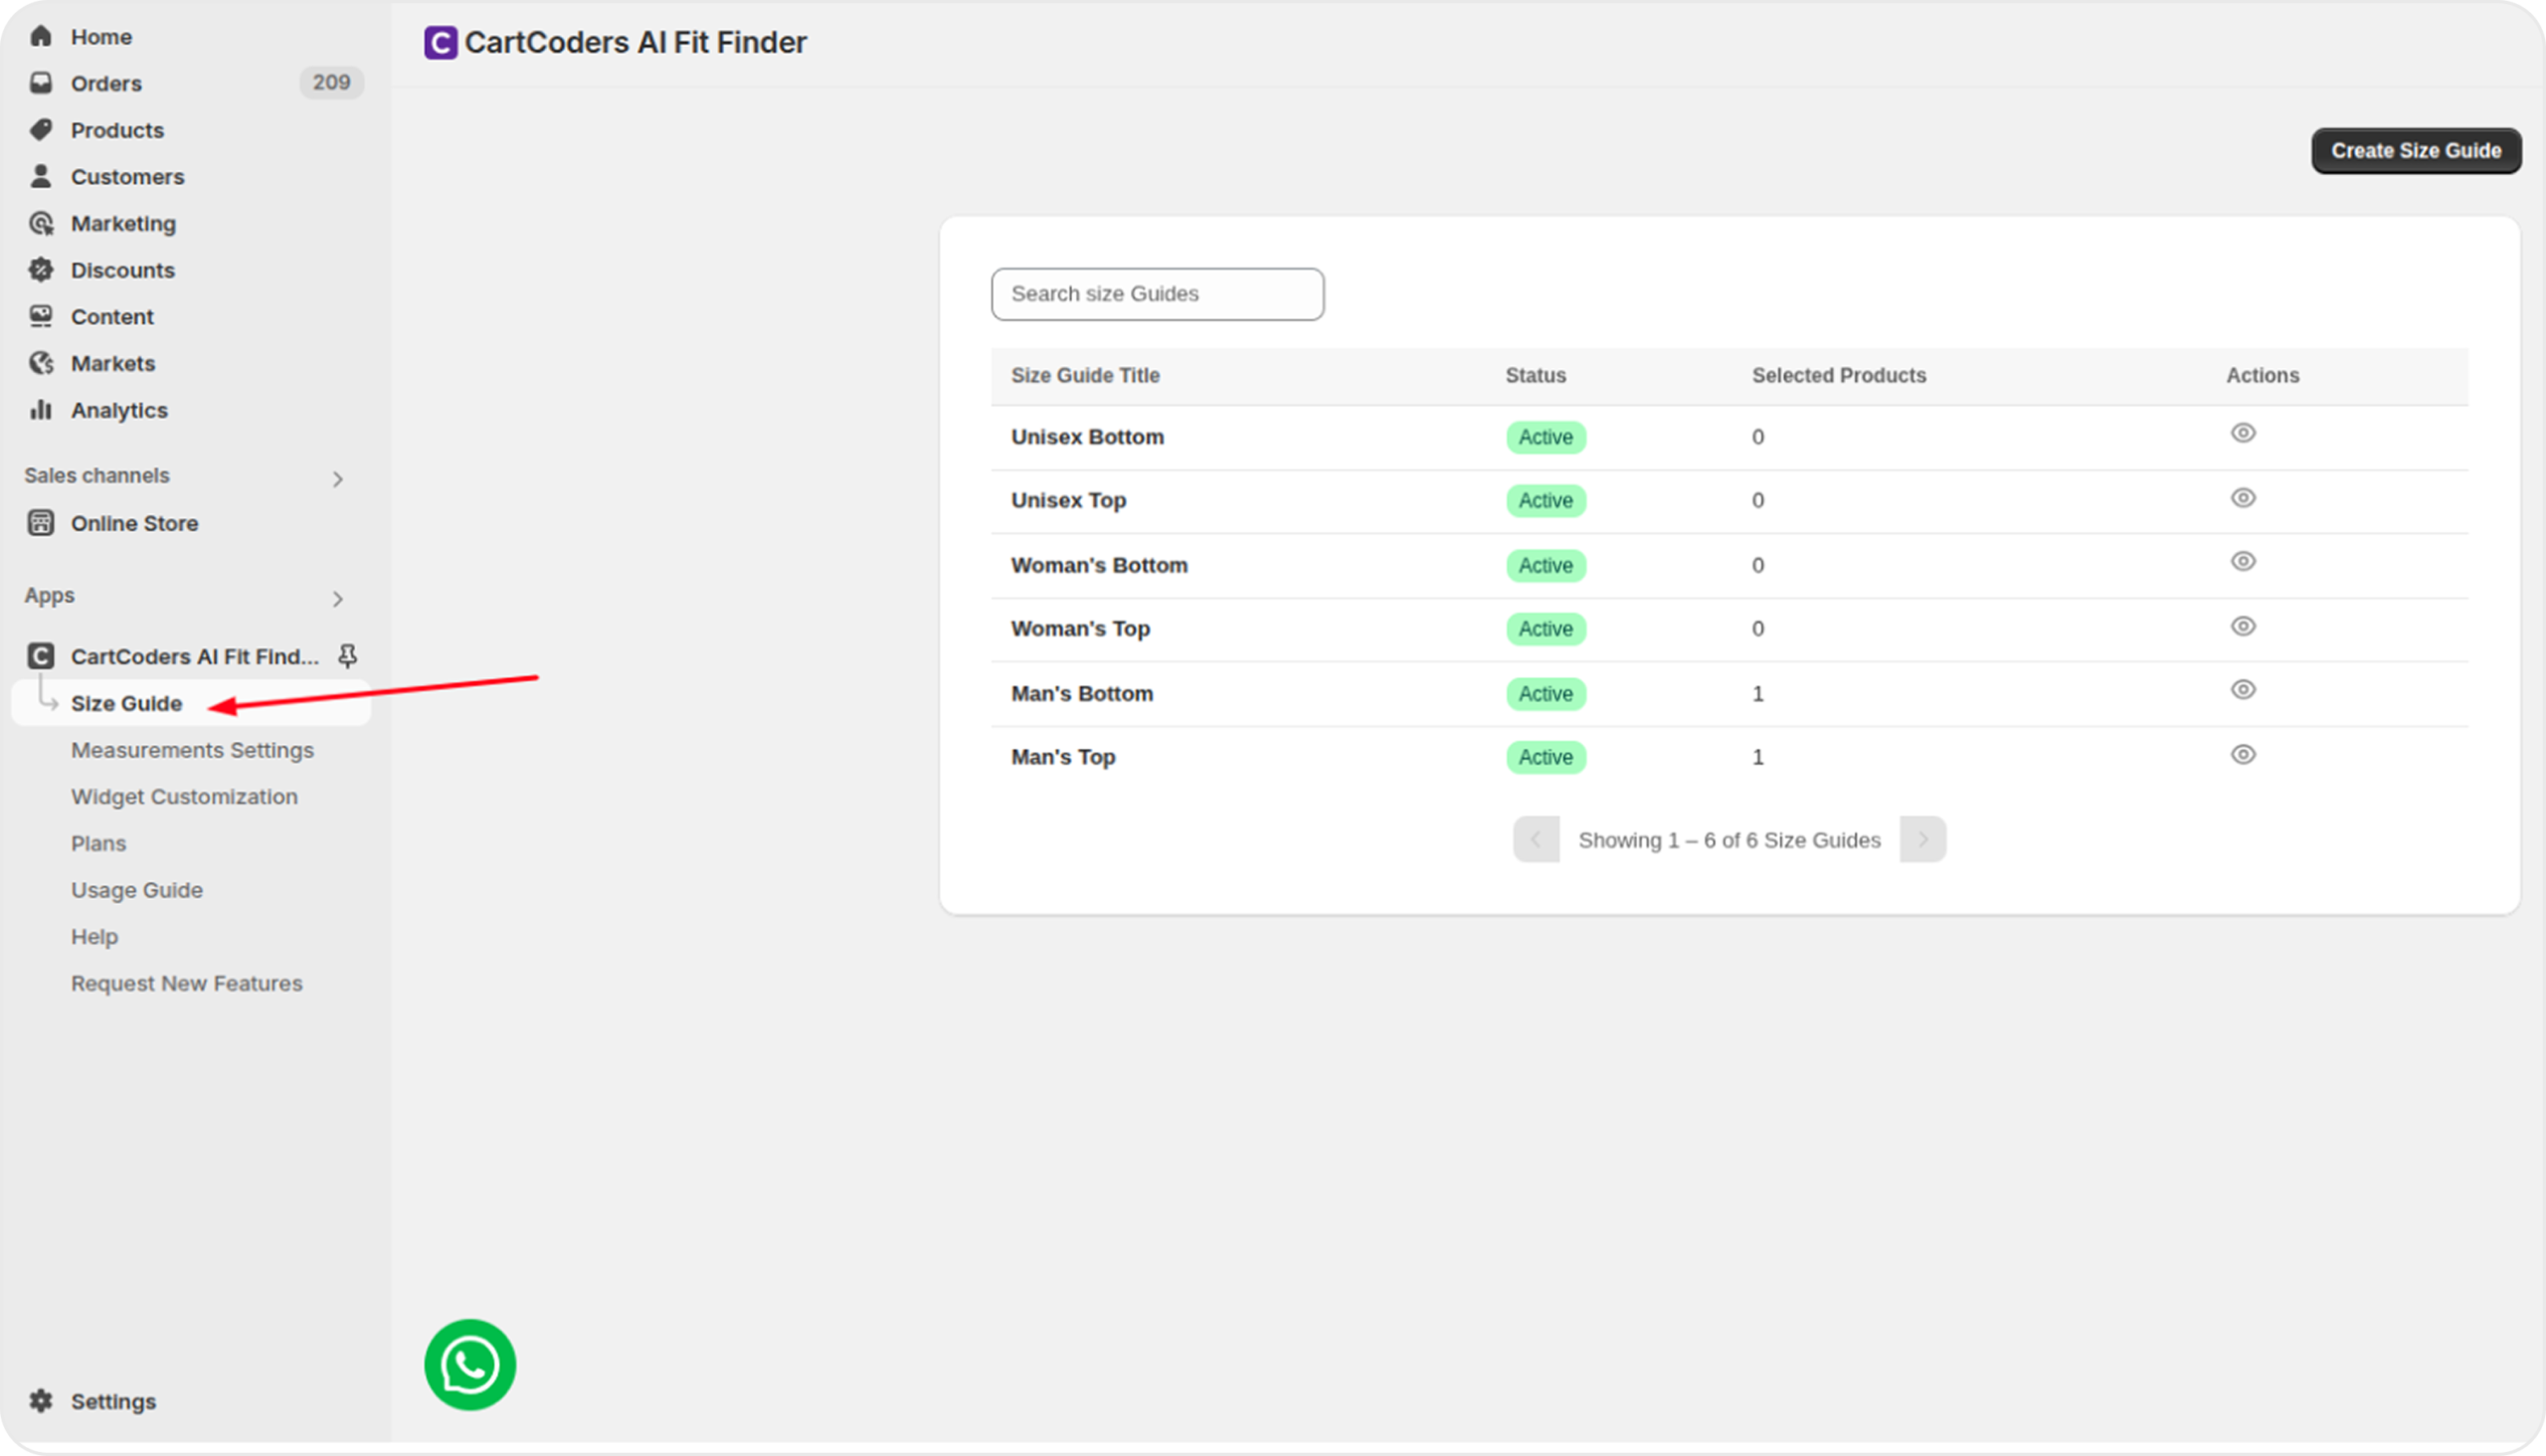
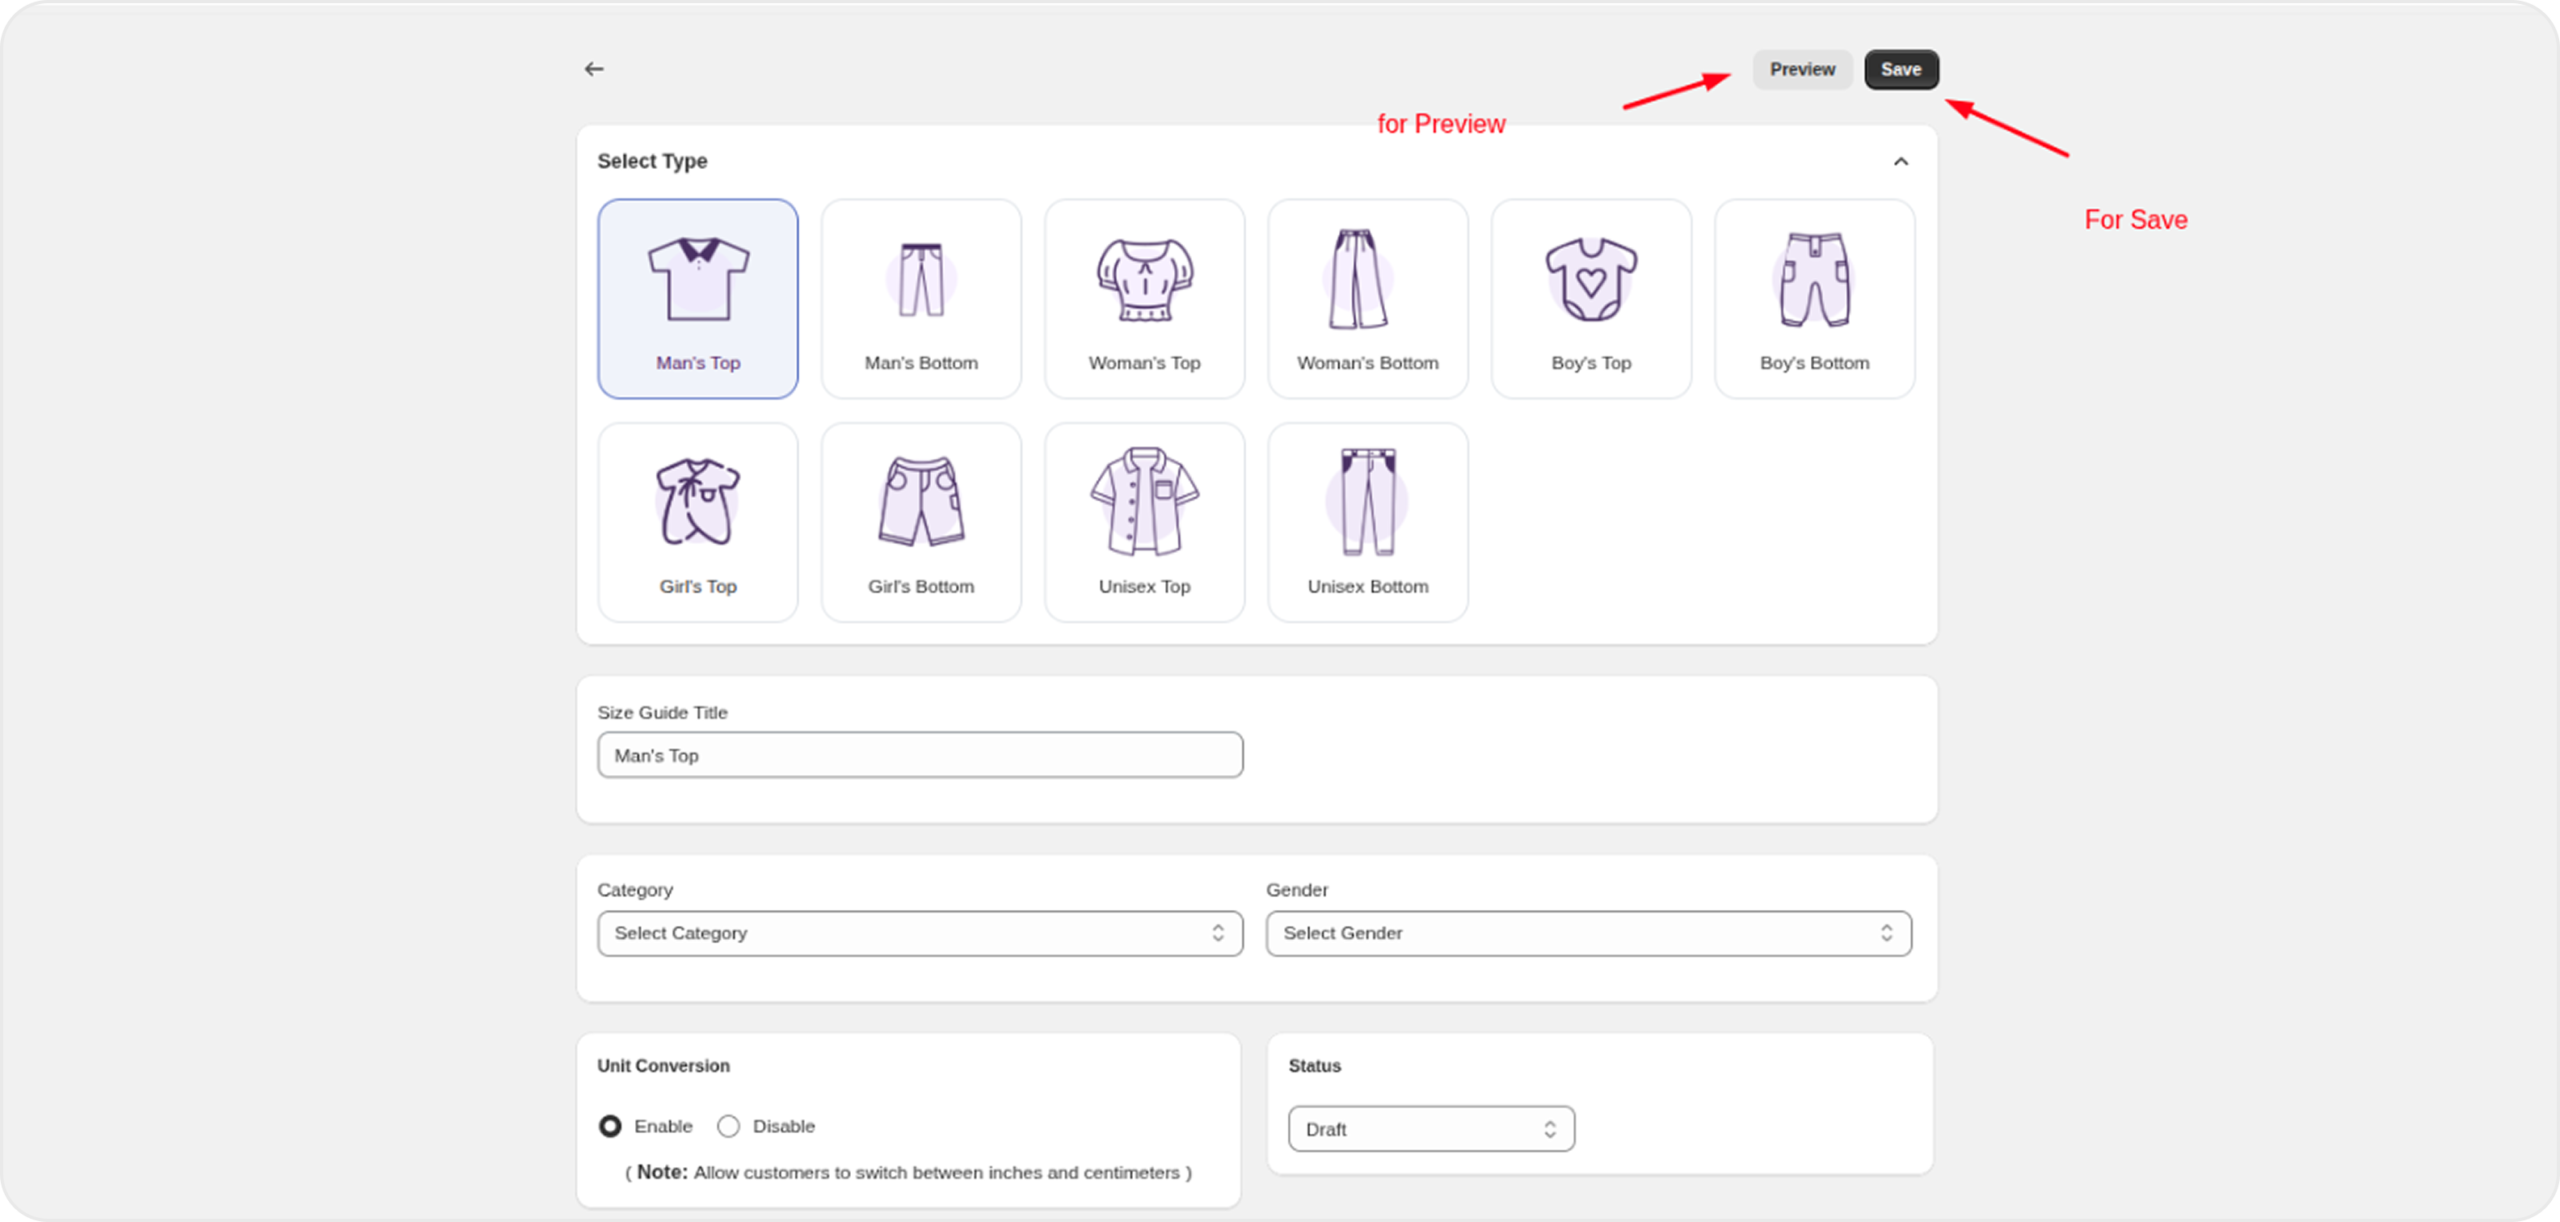
9. How to Create a Size Guide
Follow these steps to create a complete and accurate size guide for your products:
Open the Size Guide Section
In your Shopify admin, open AI Fit Finder and navigate to the Size Guide tab from the app dashboard.
From here, you can create and manage size guides tailored to your product categories and measurements.
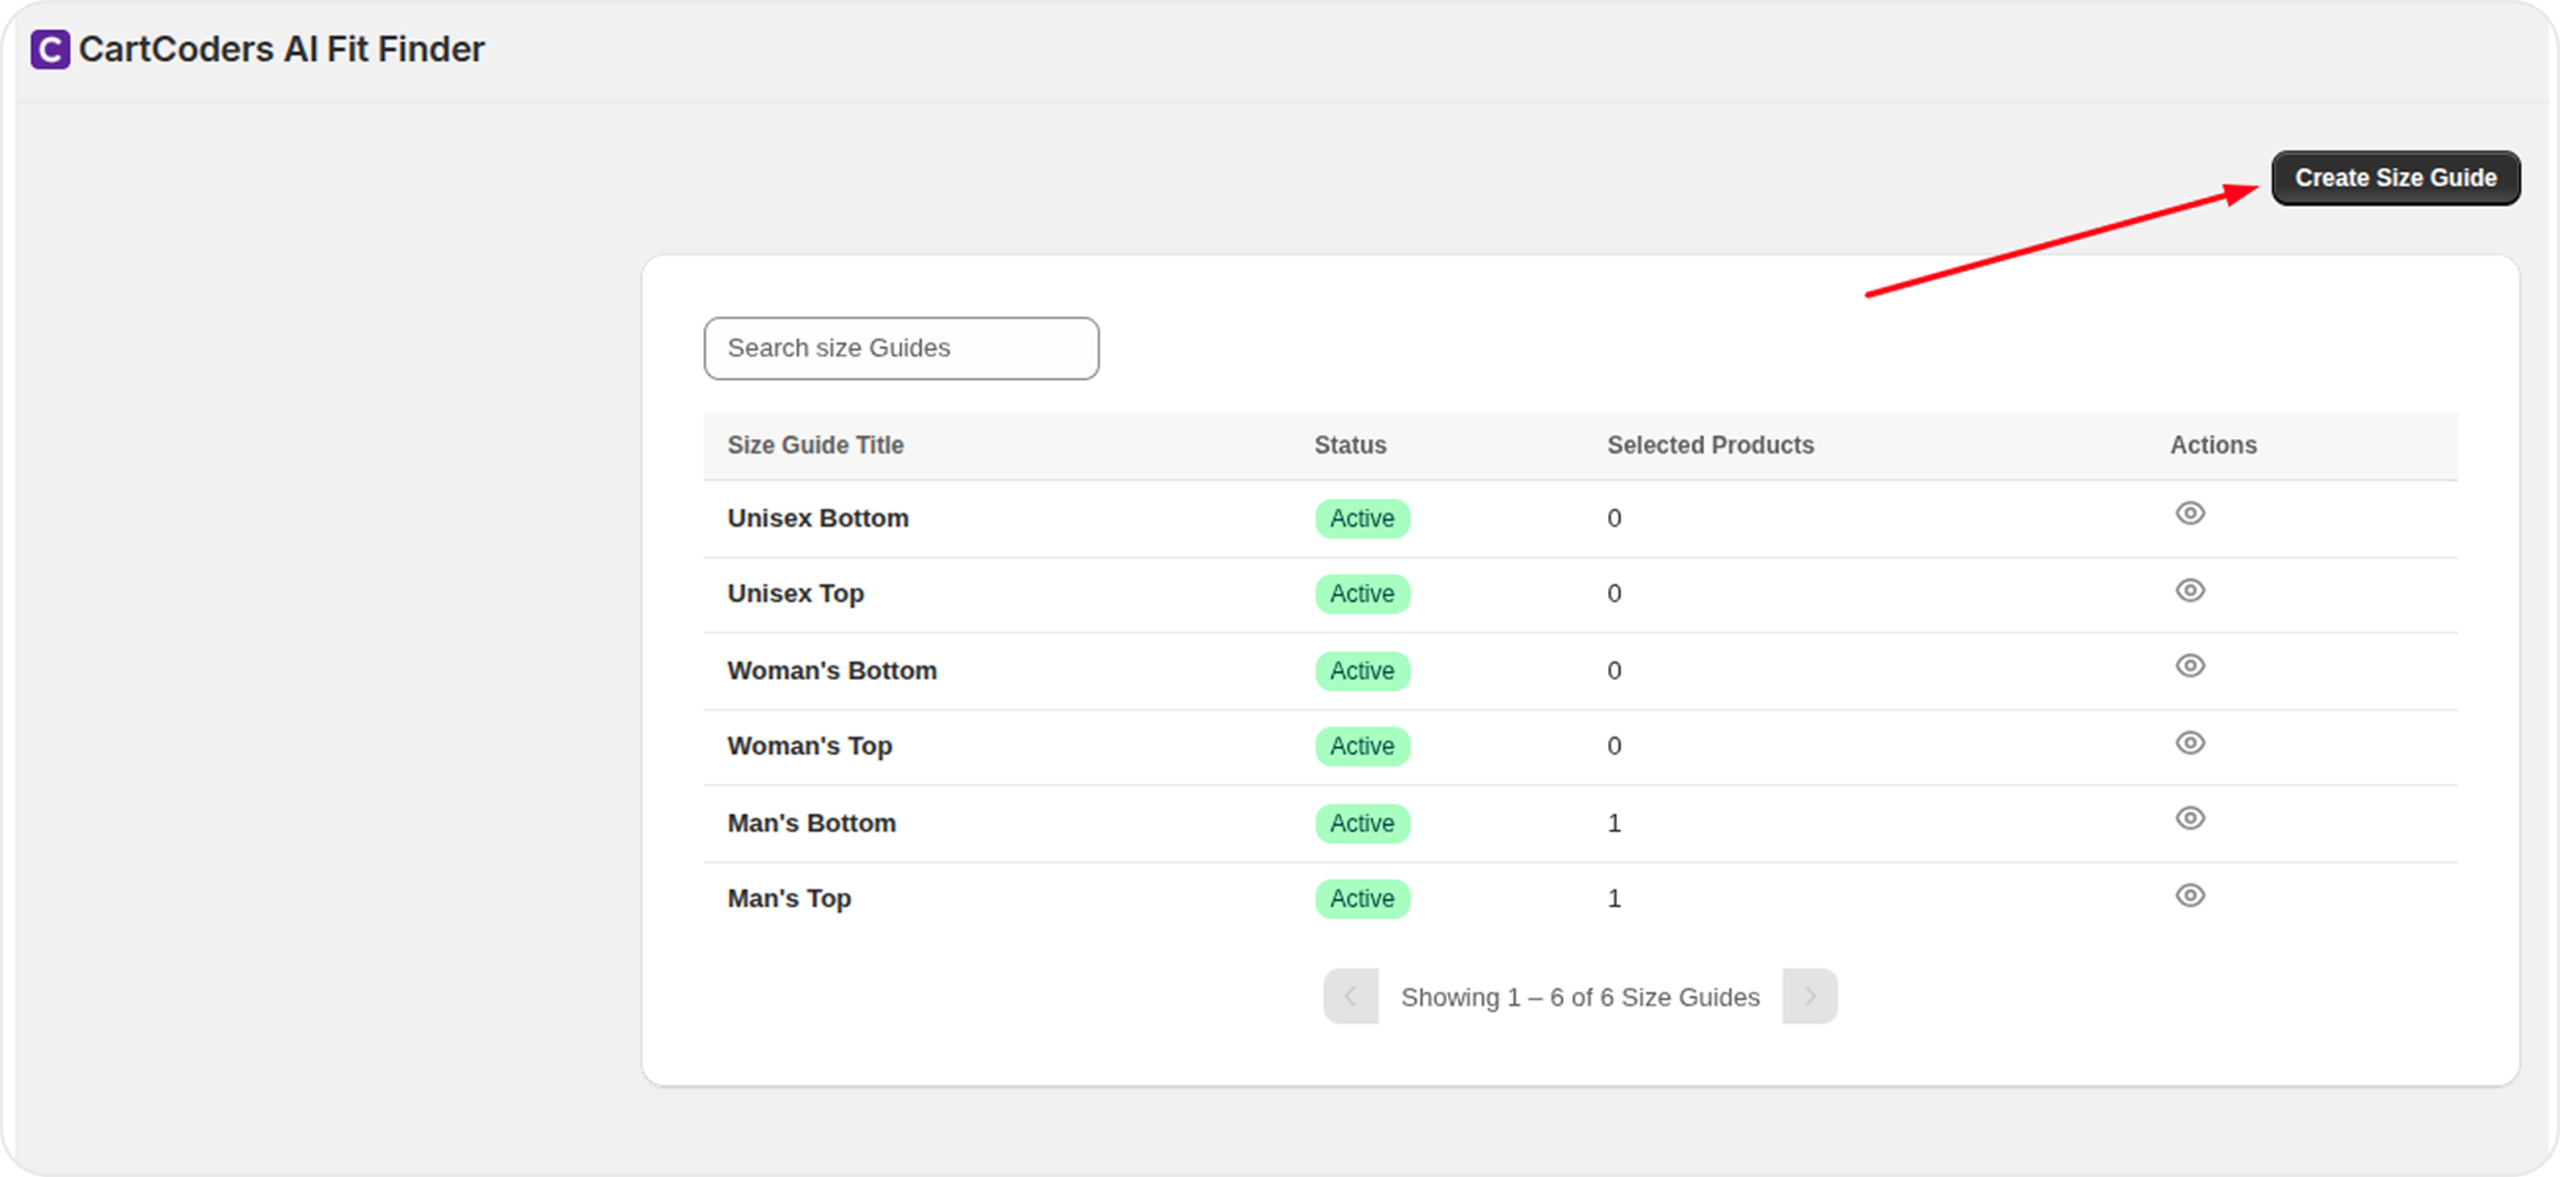
Click “Create Size Guide”
On the Size Guide page, click the Create Size Guide button located in the top-right corner to start setting up a new size guide.
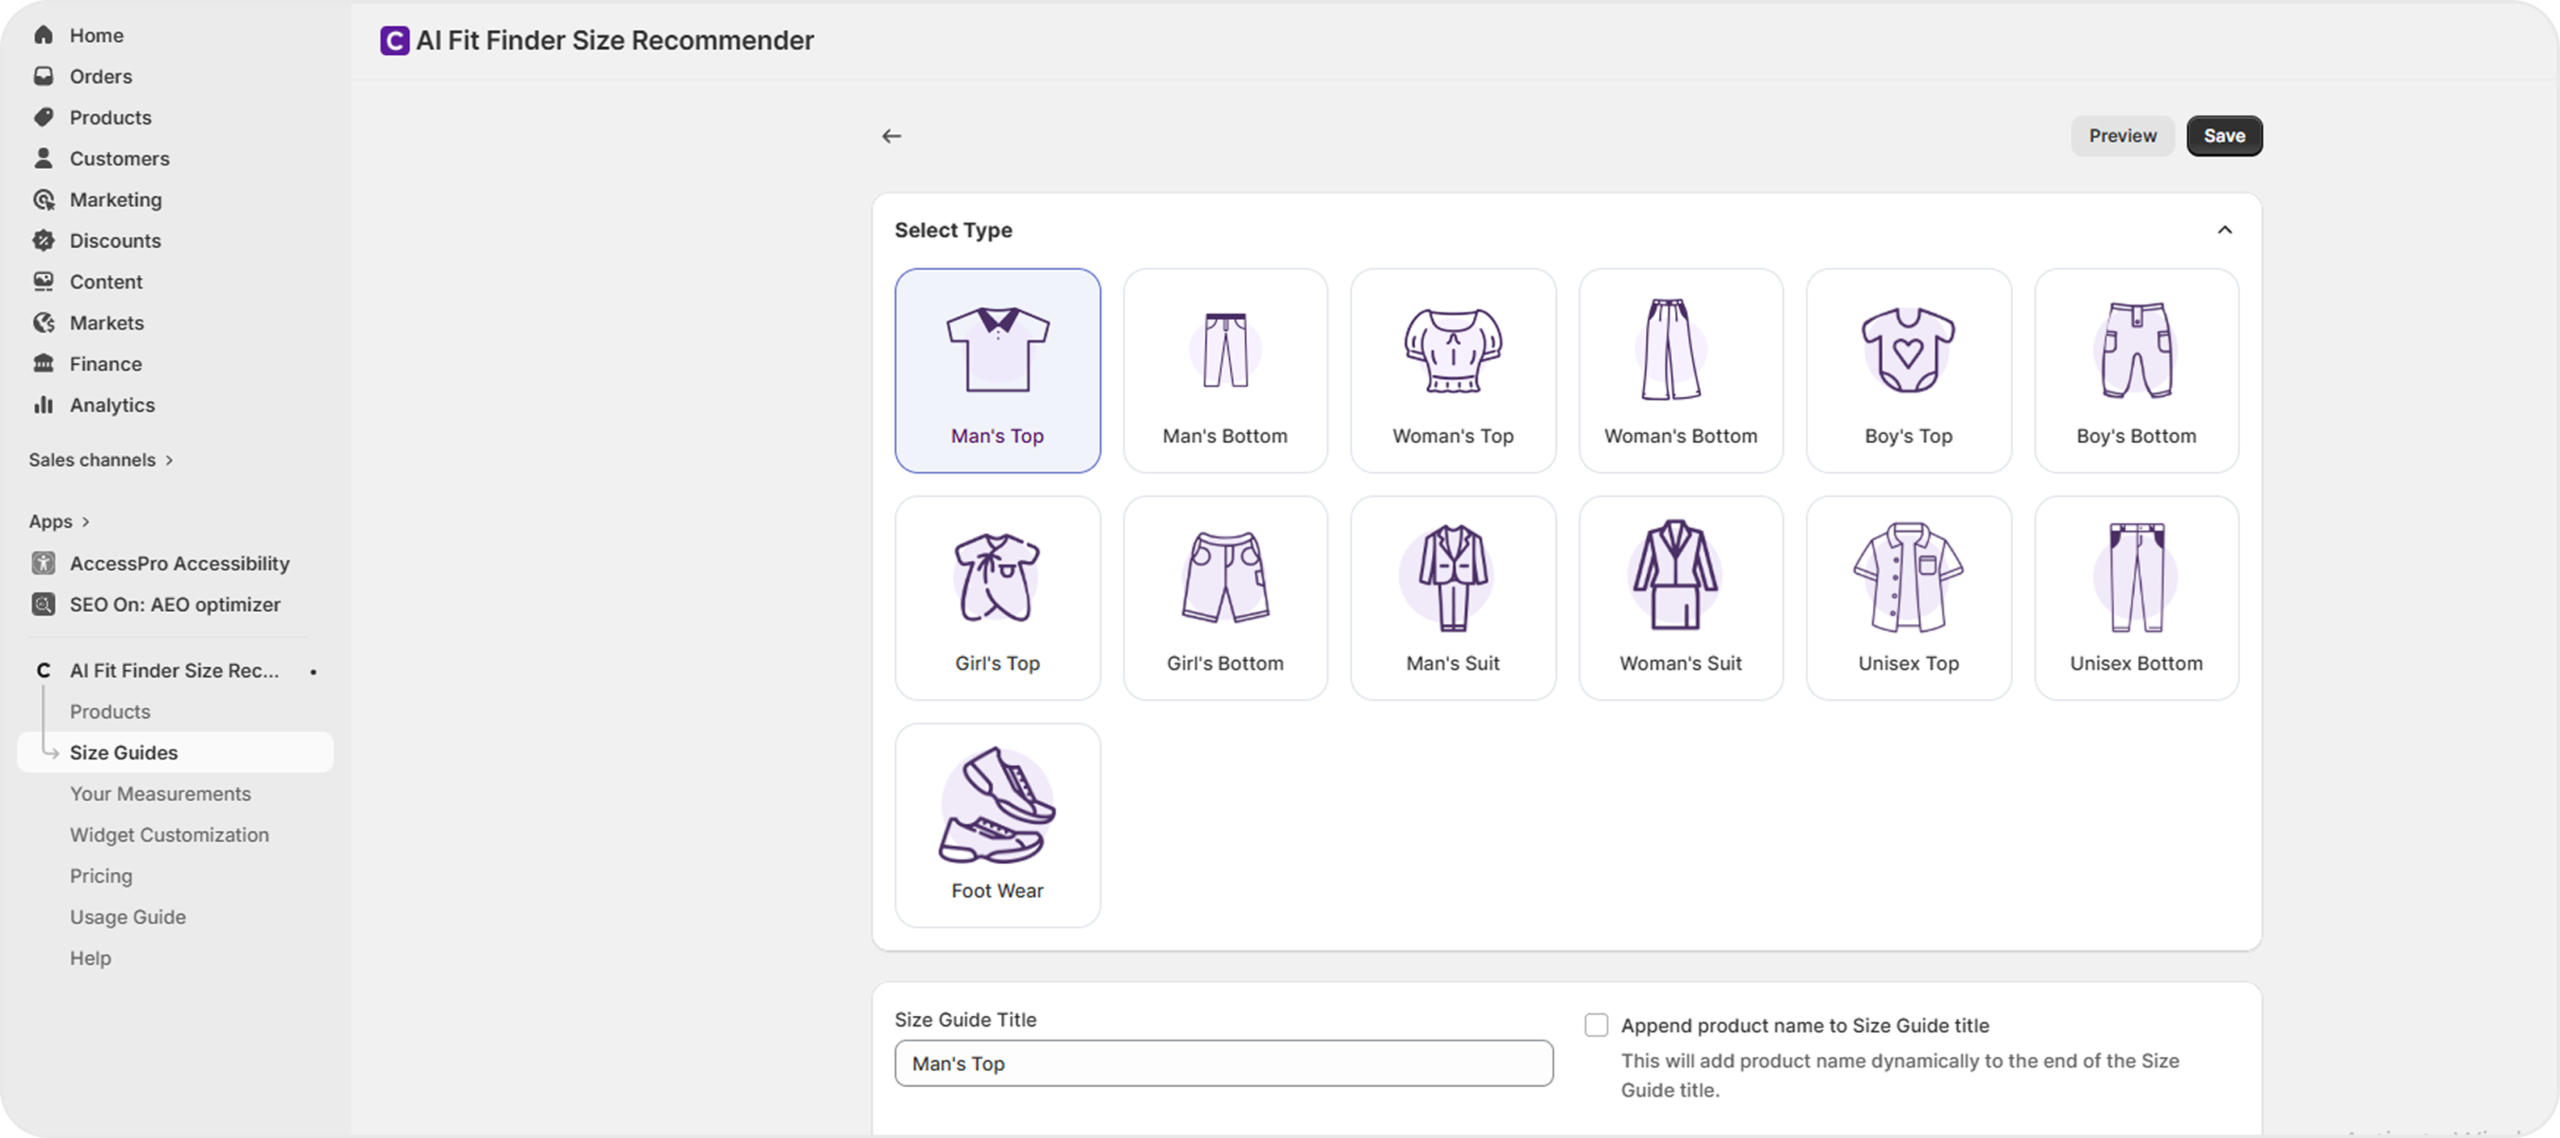
Select Size Guide Type
Choose the appropriate template based on your product category:
Selecting the correct type ensures accurate measurements and better size recommendations.
Configure Basic Settings & Unit Conversion
Set up the foundational details for your size guide:
Enabling unit conversion gives shoppers flexibility, while disabling ensures a consistent display across your store.
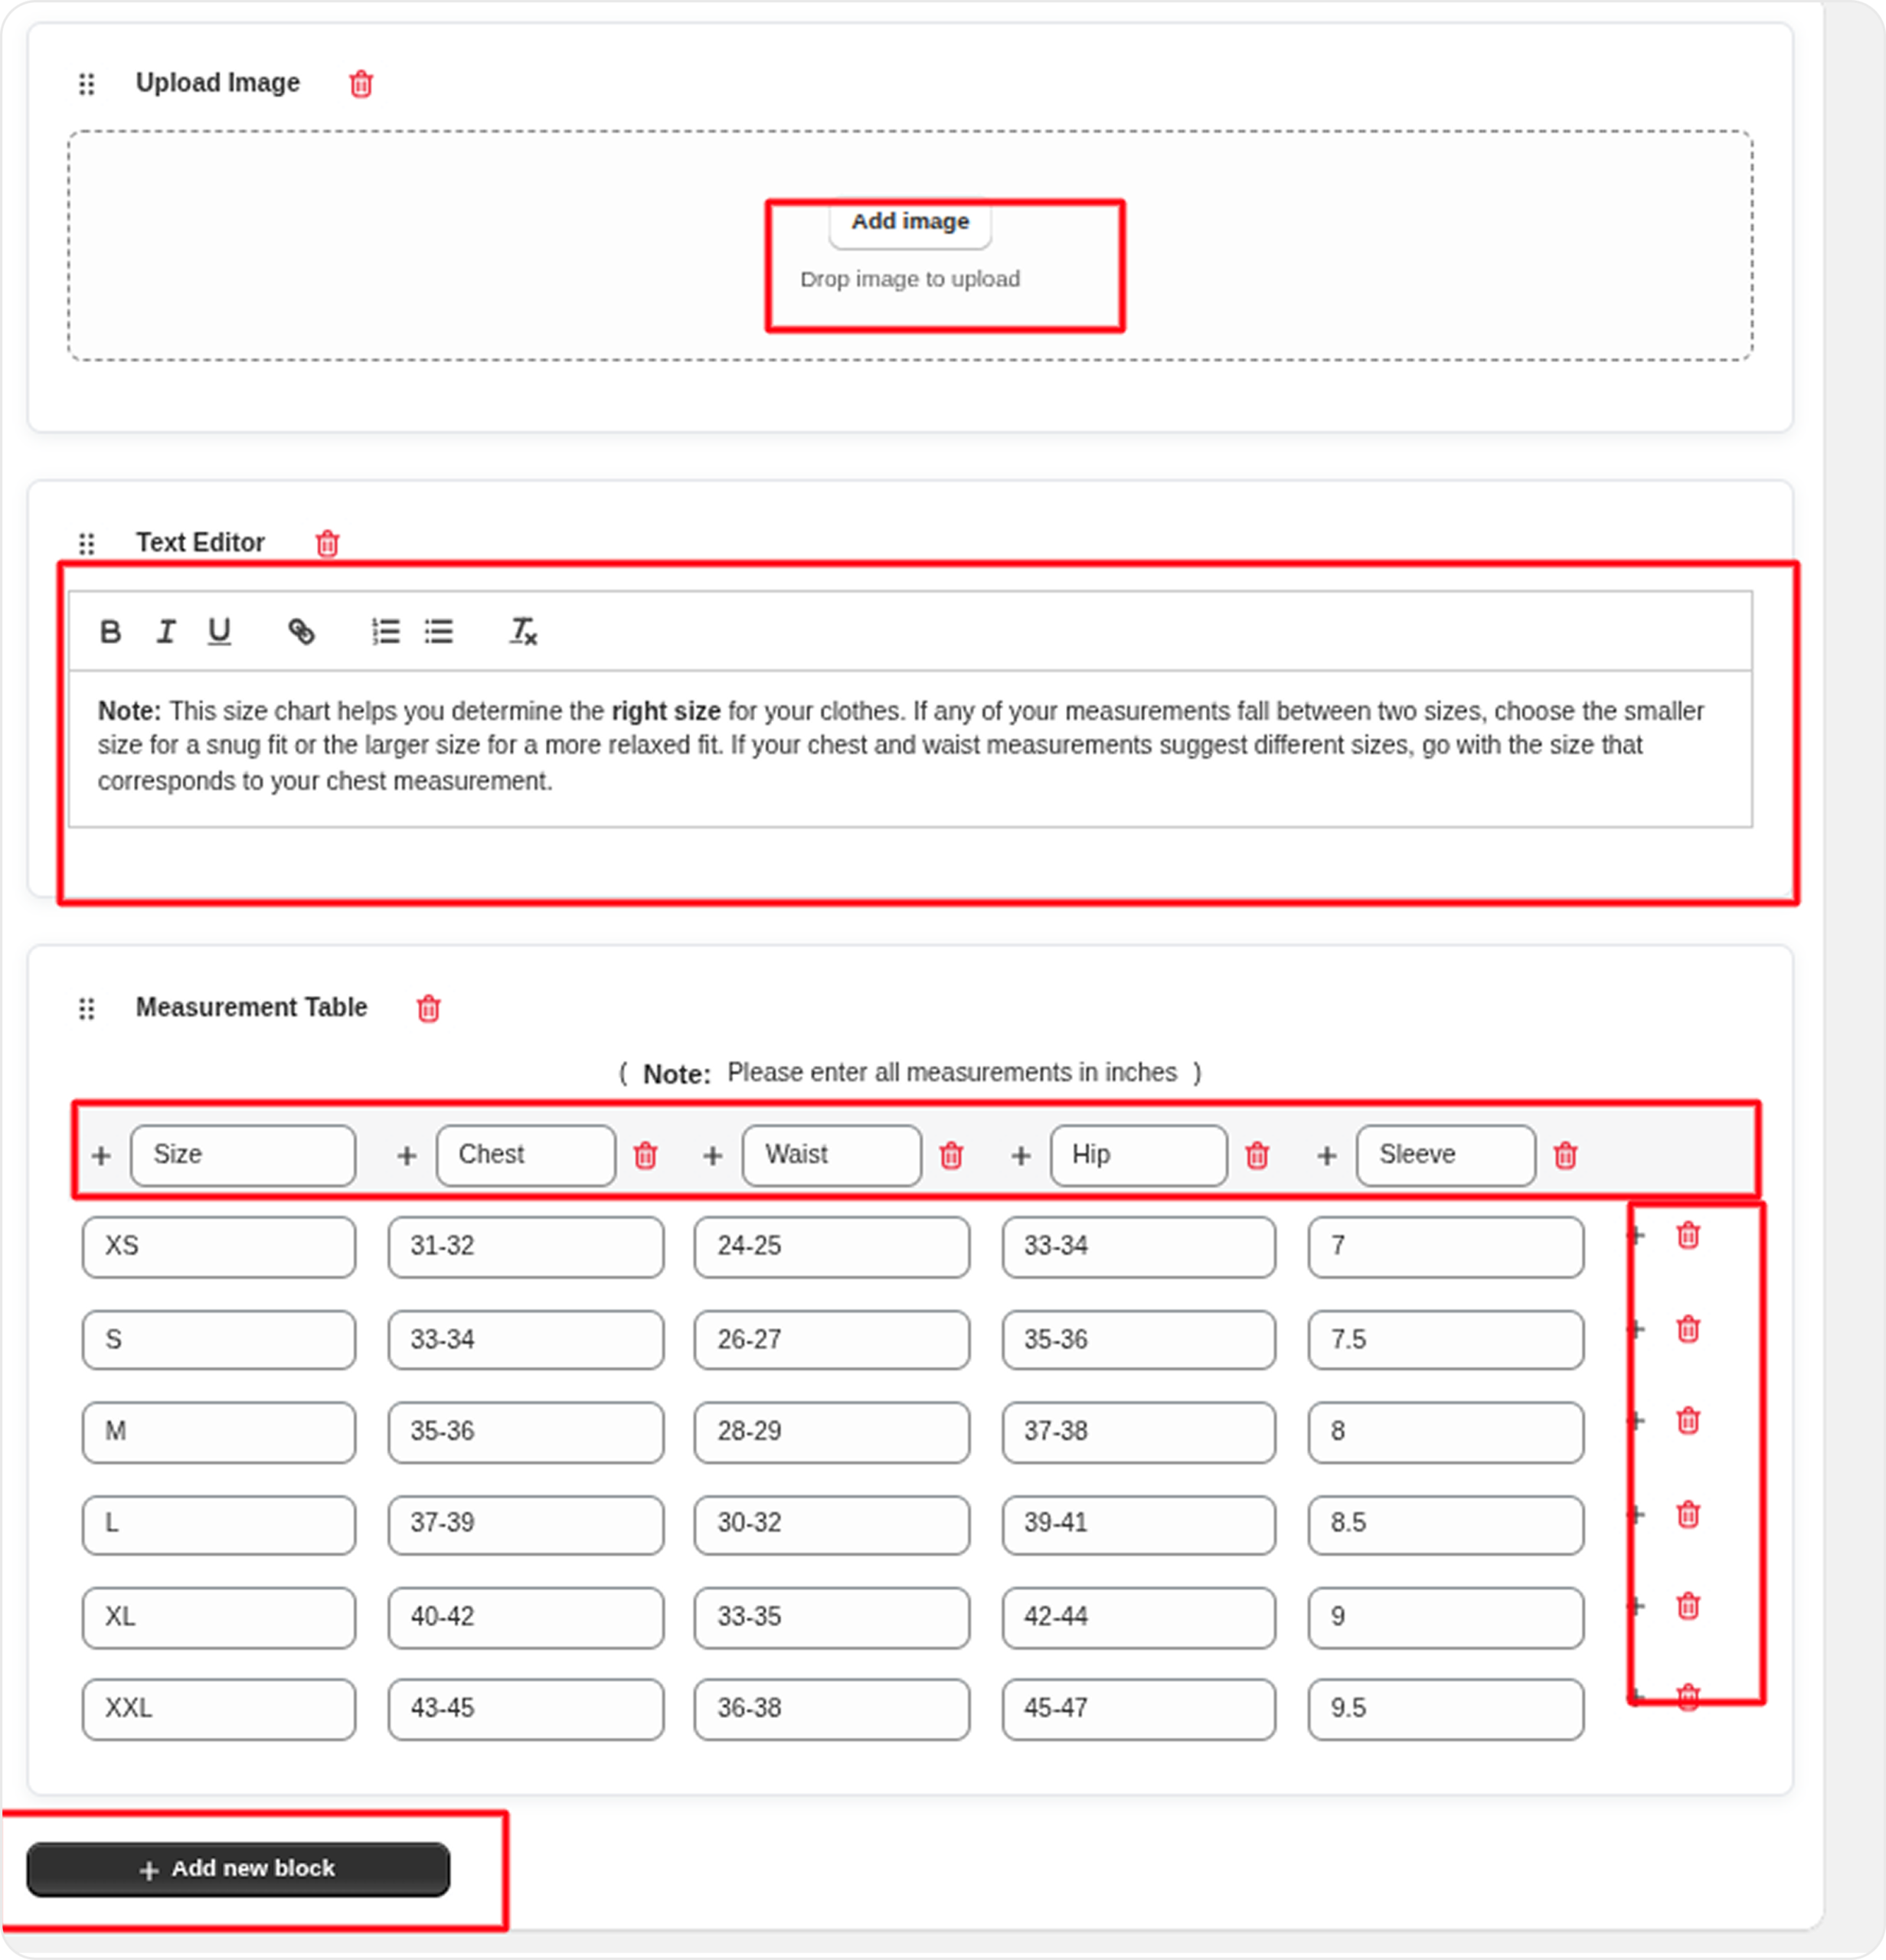
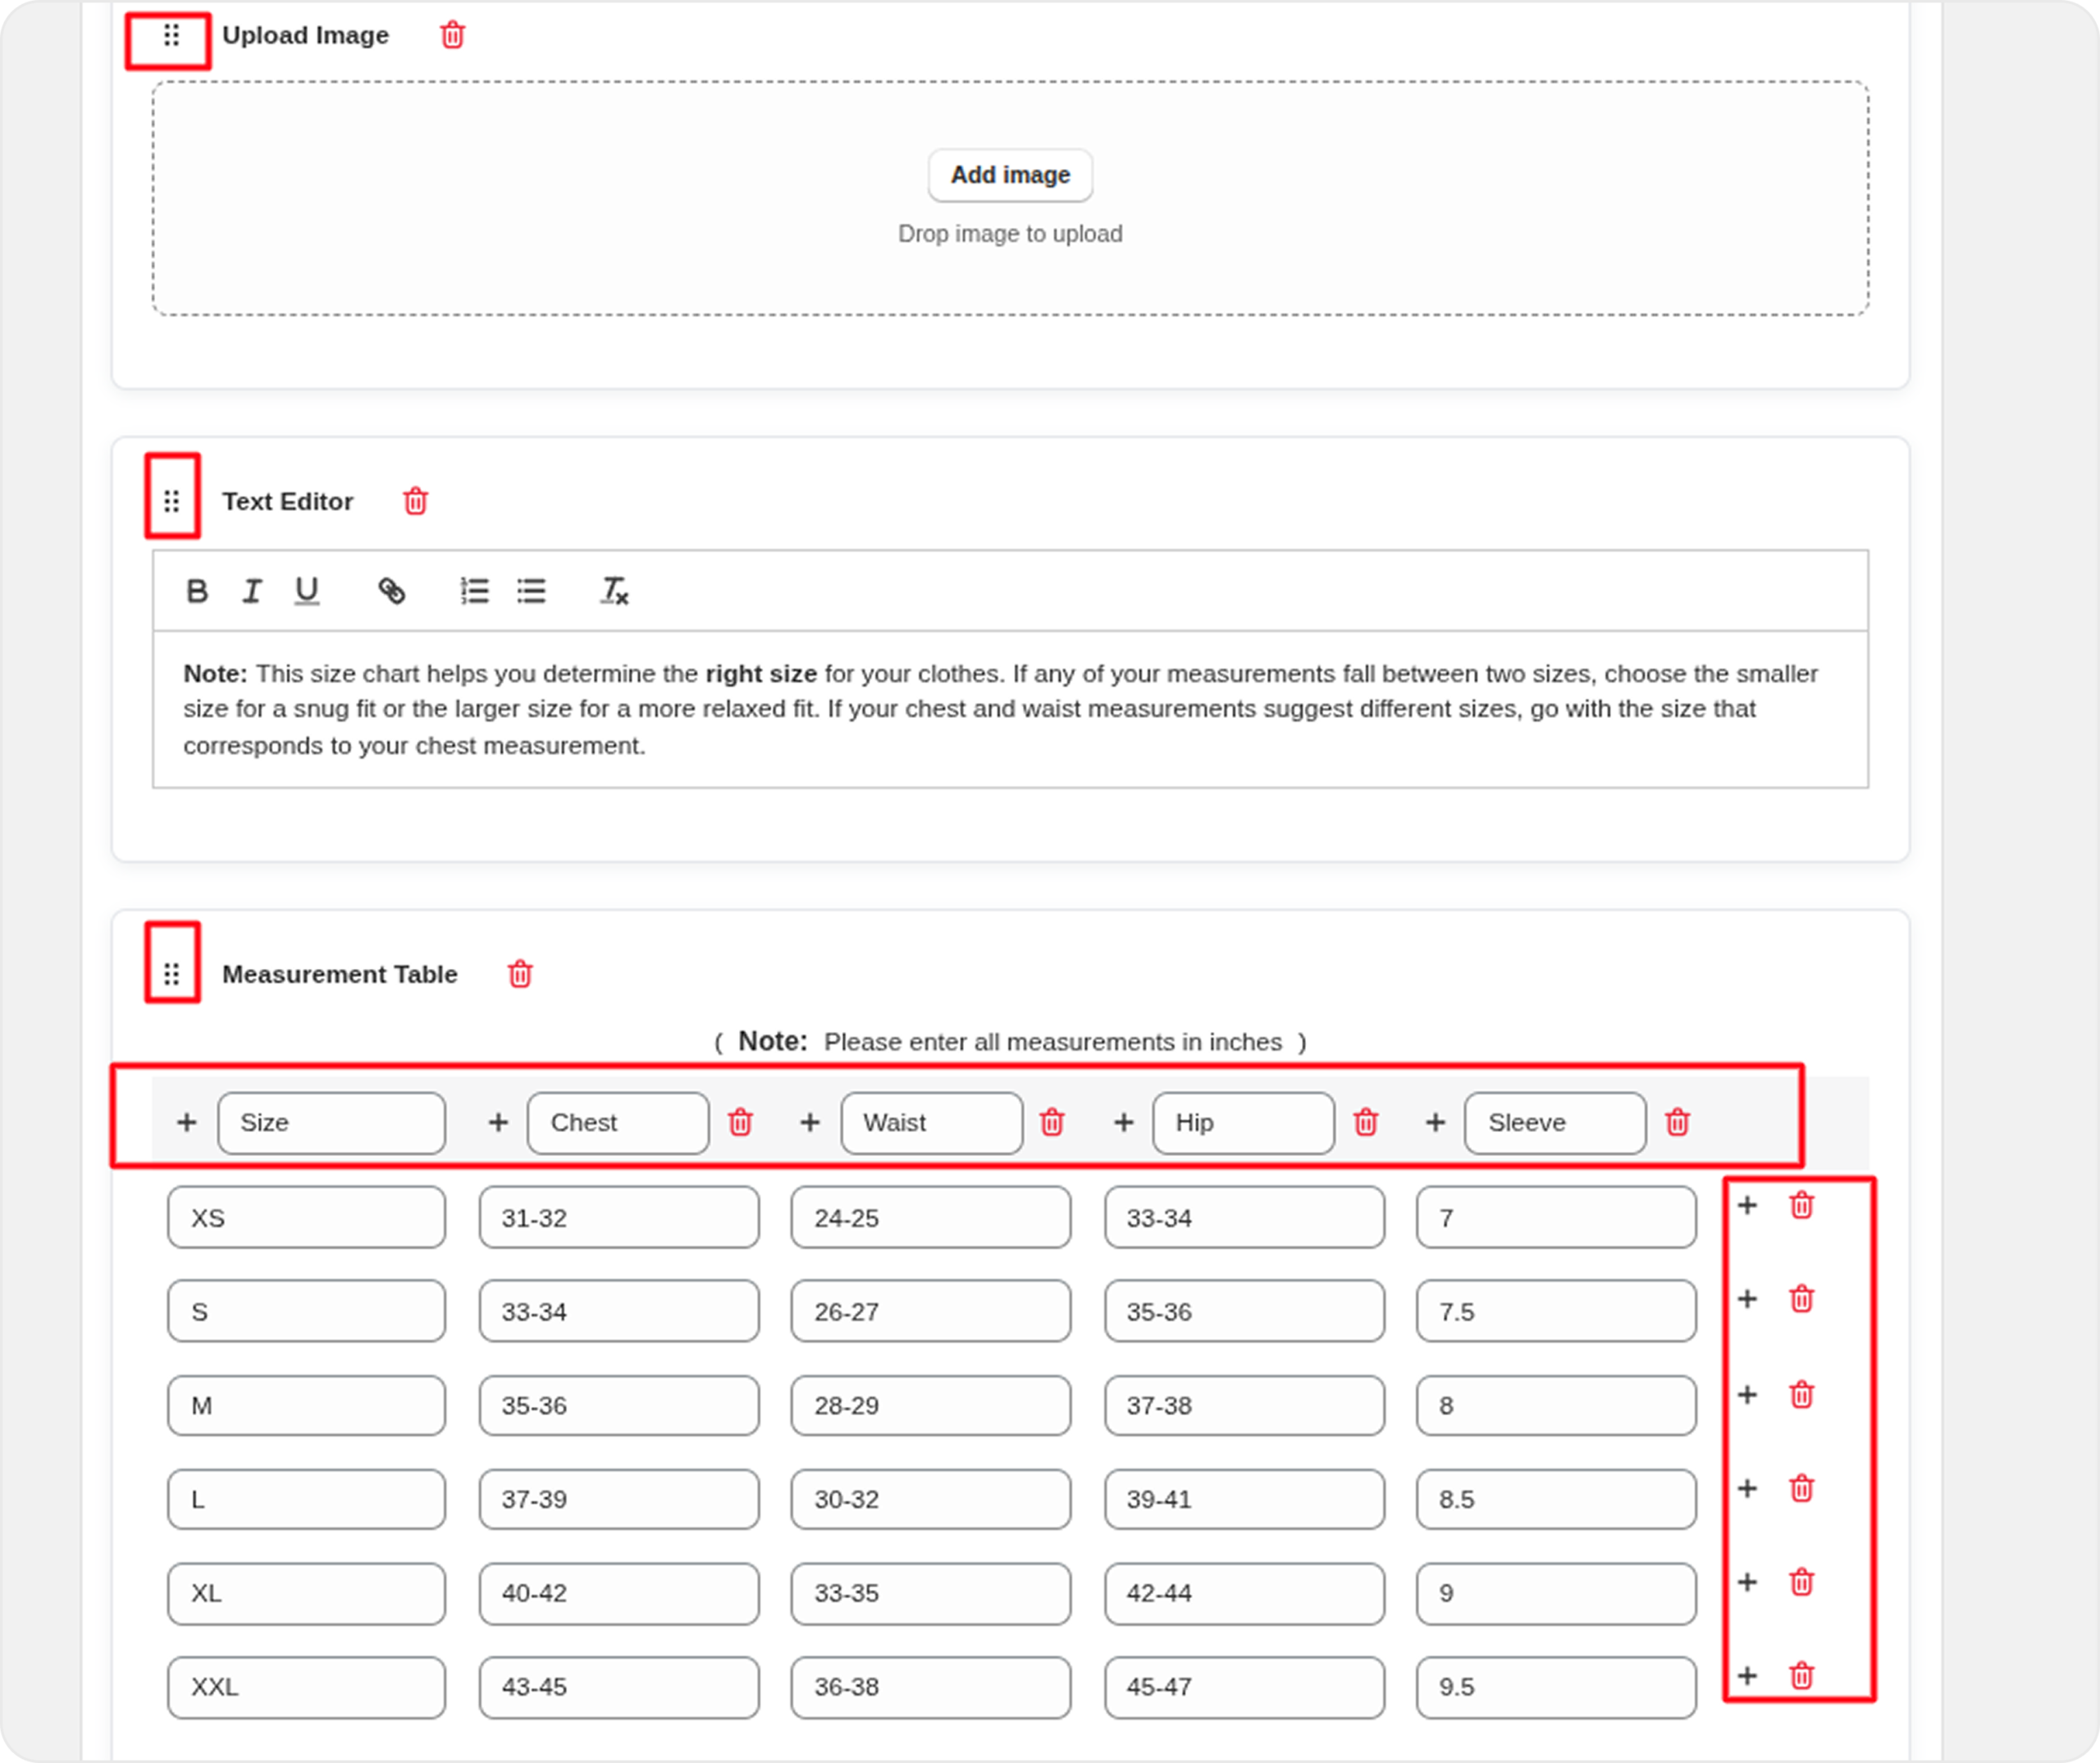
Build Your Size Guide Content
Customize your size guide using the available content blocks:
These blocks help create a clear, informative, and user-friendly size guide for your store.
Arrange & Customize Blocks
Easily organize your size guide for clarity and impact:
This flexibility ensures your size guide is clear, visually appealing, and tailored to your customers’ needs.
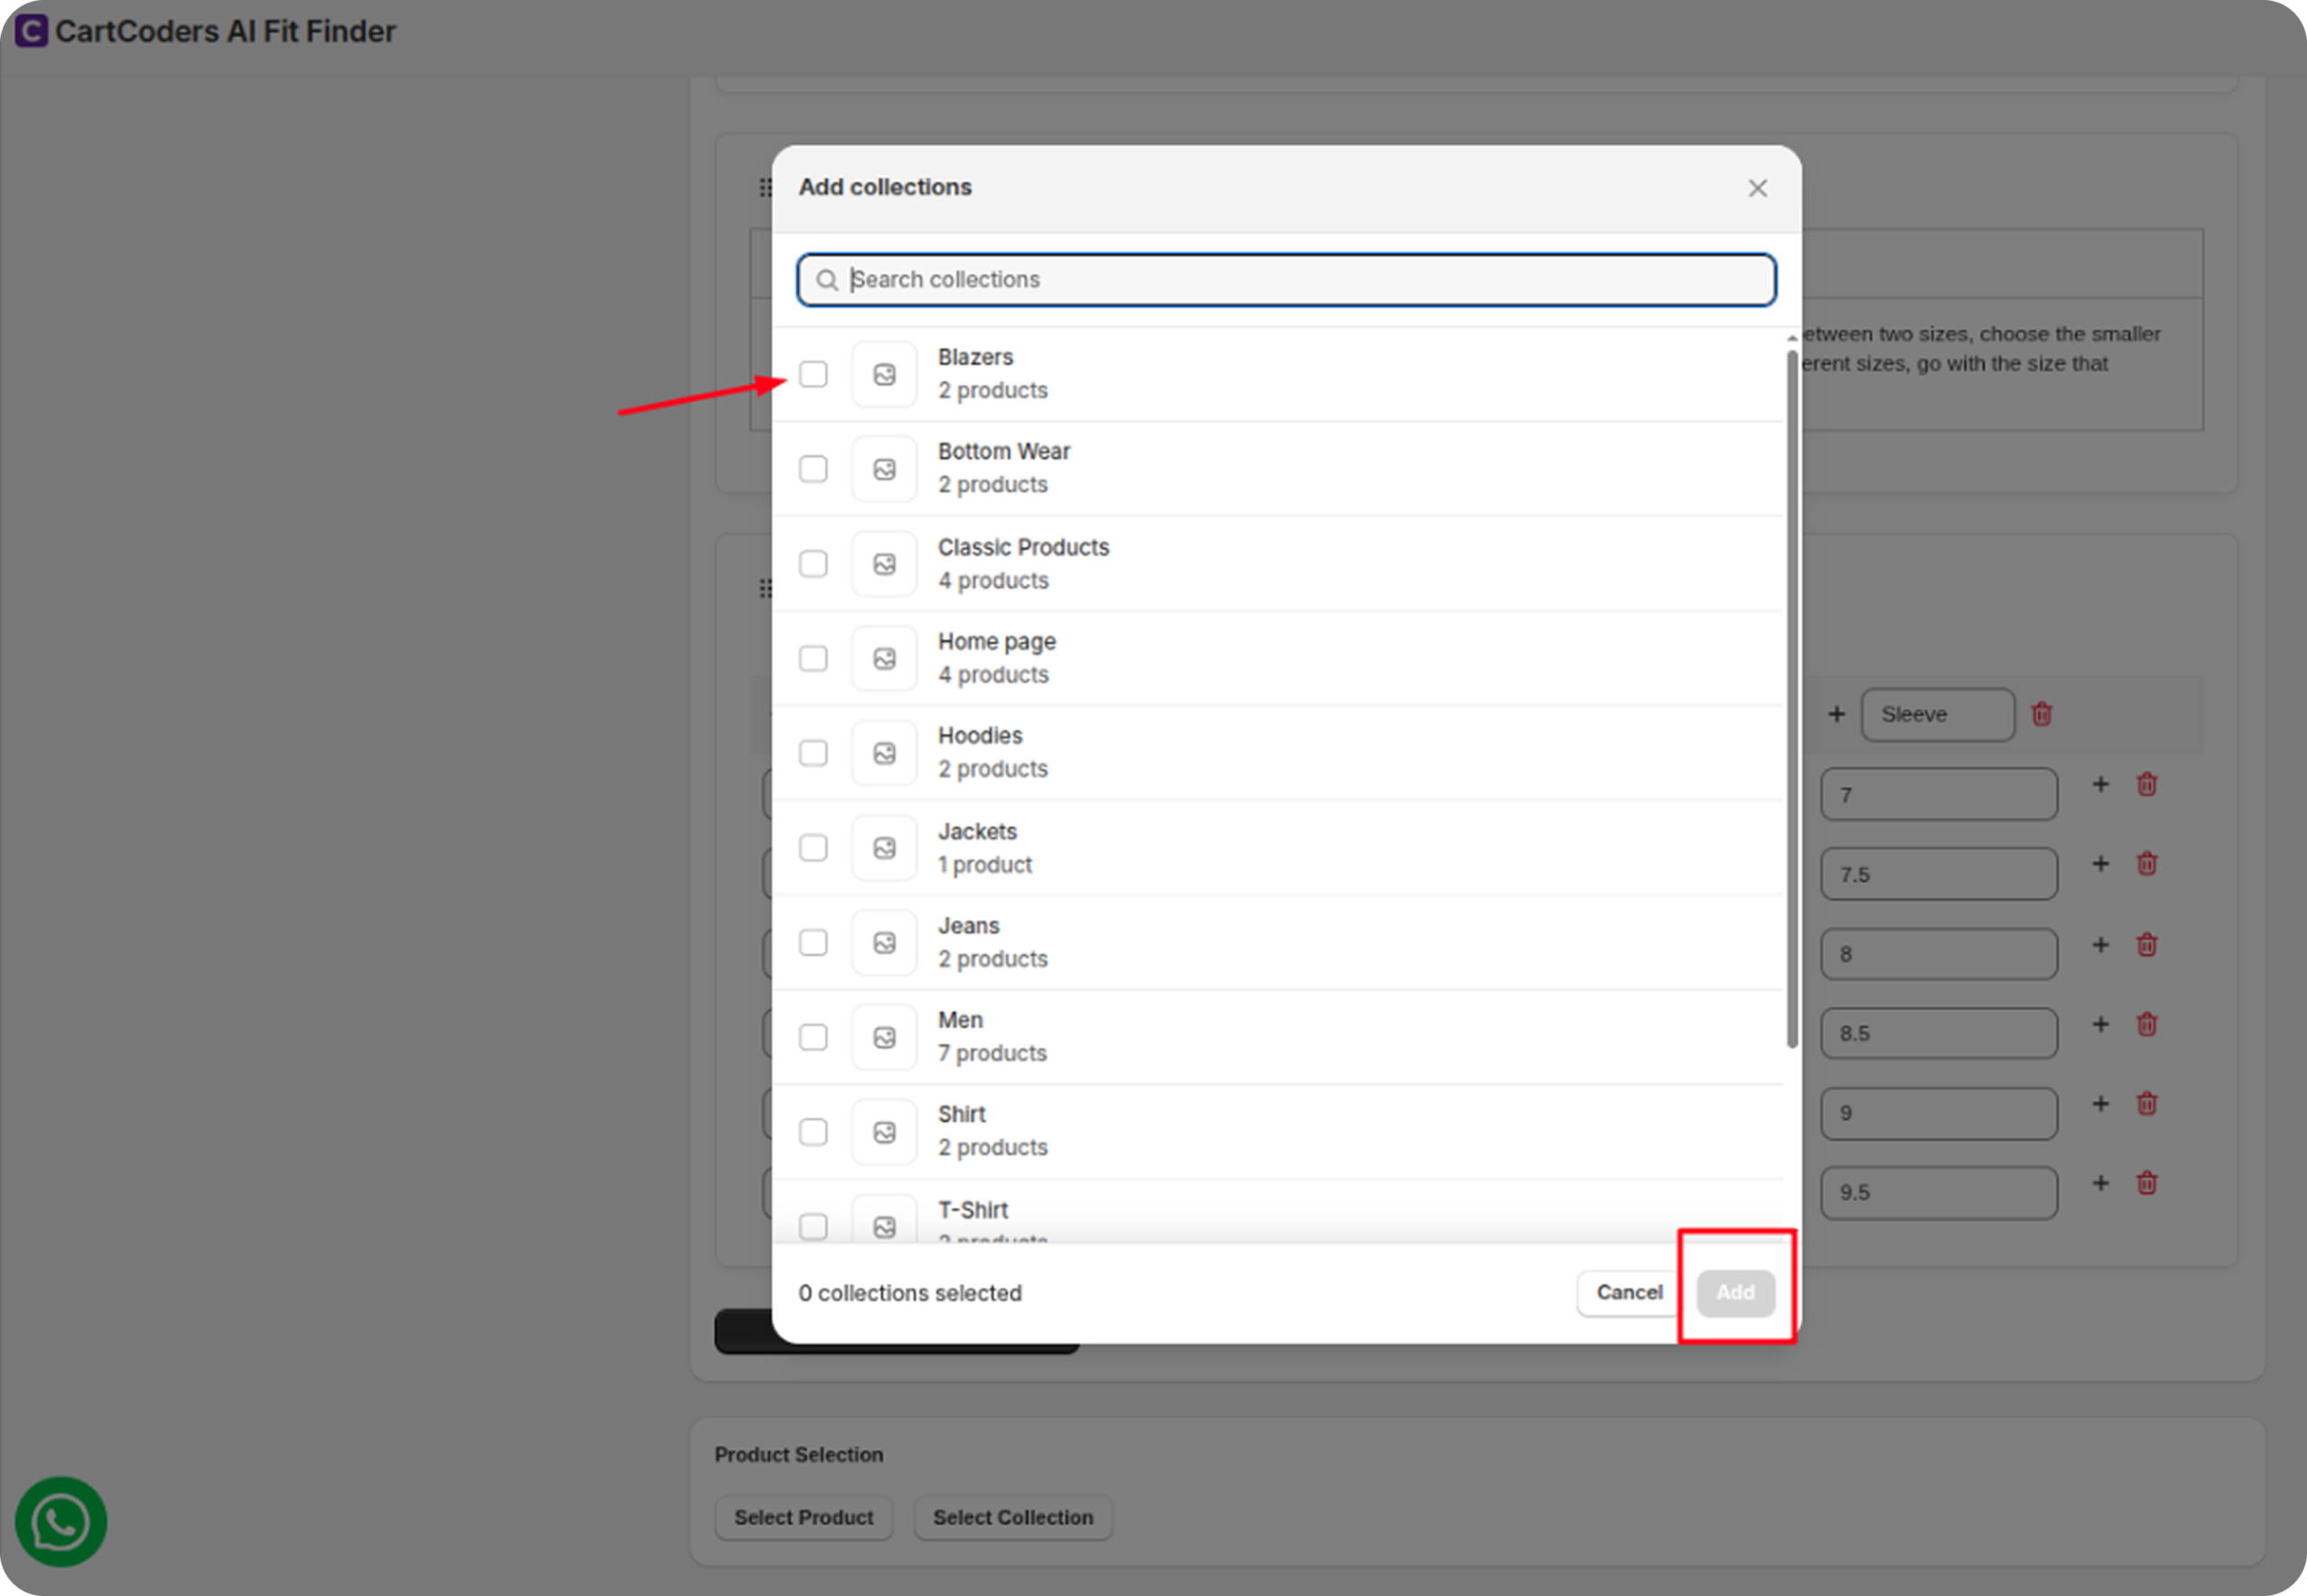
Select Products & Collections
Assign your size guide to specific products or entire collections. At least one product or collection must be selected to activate the size guide.
This ensures the guide appears on the right items and provides accurate sizing information to your customers.
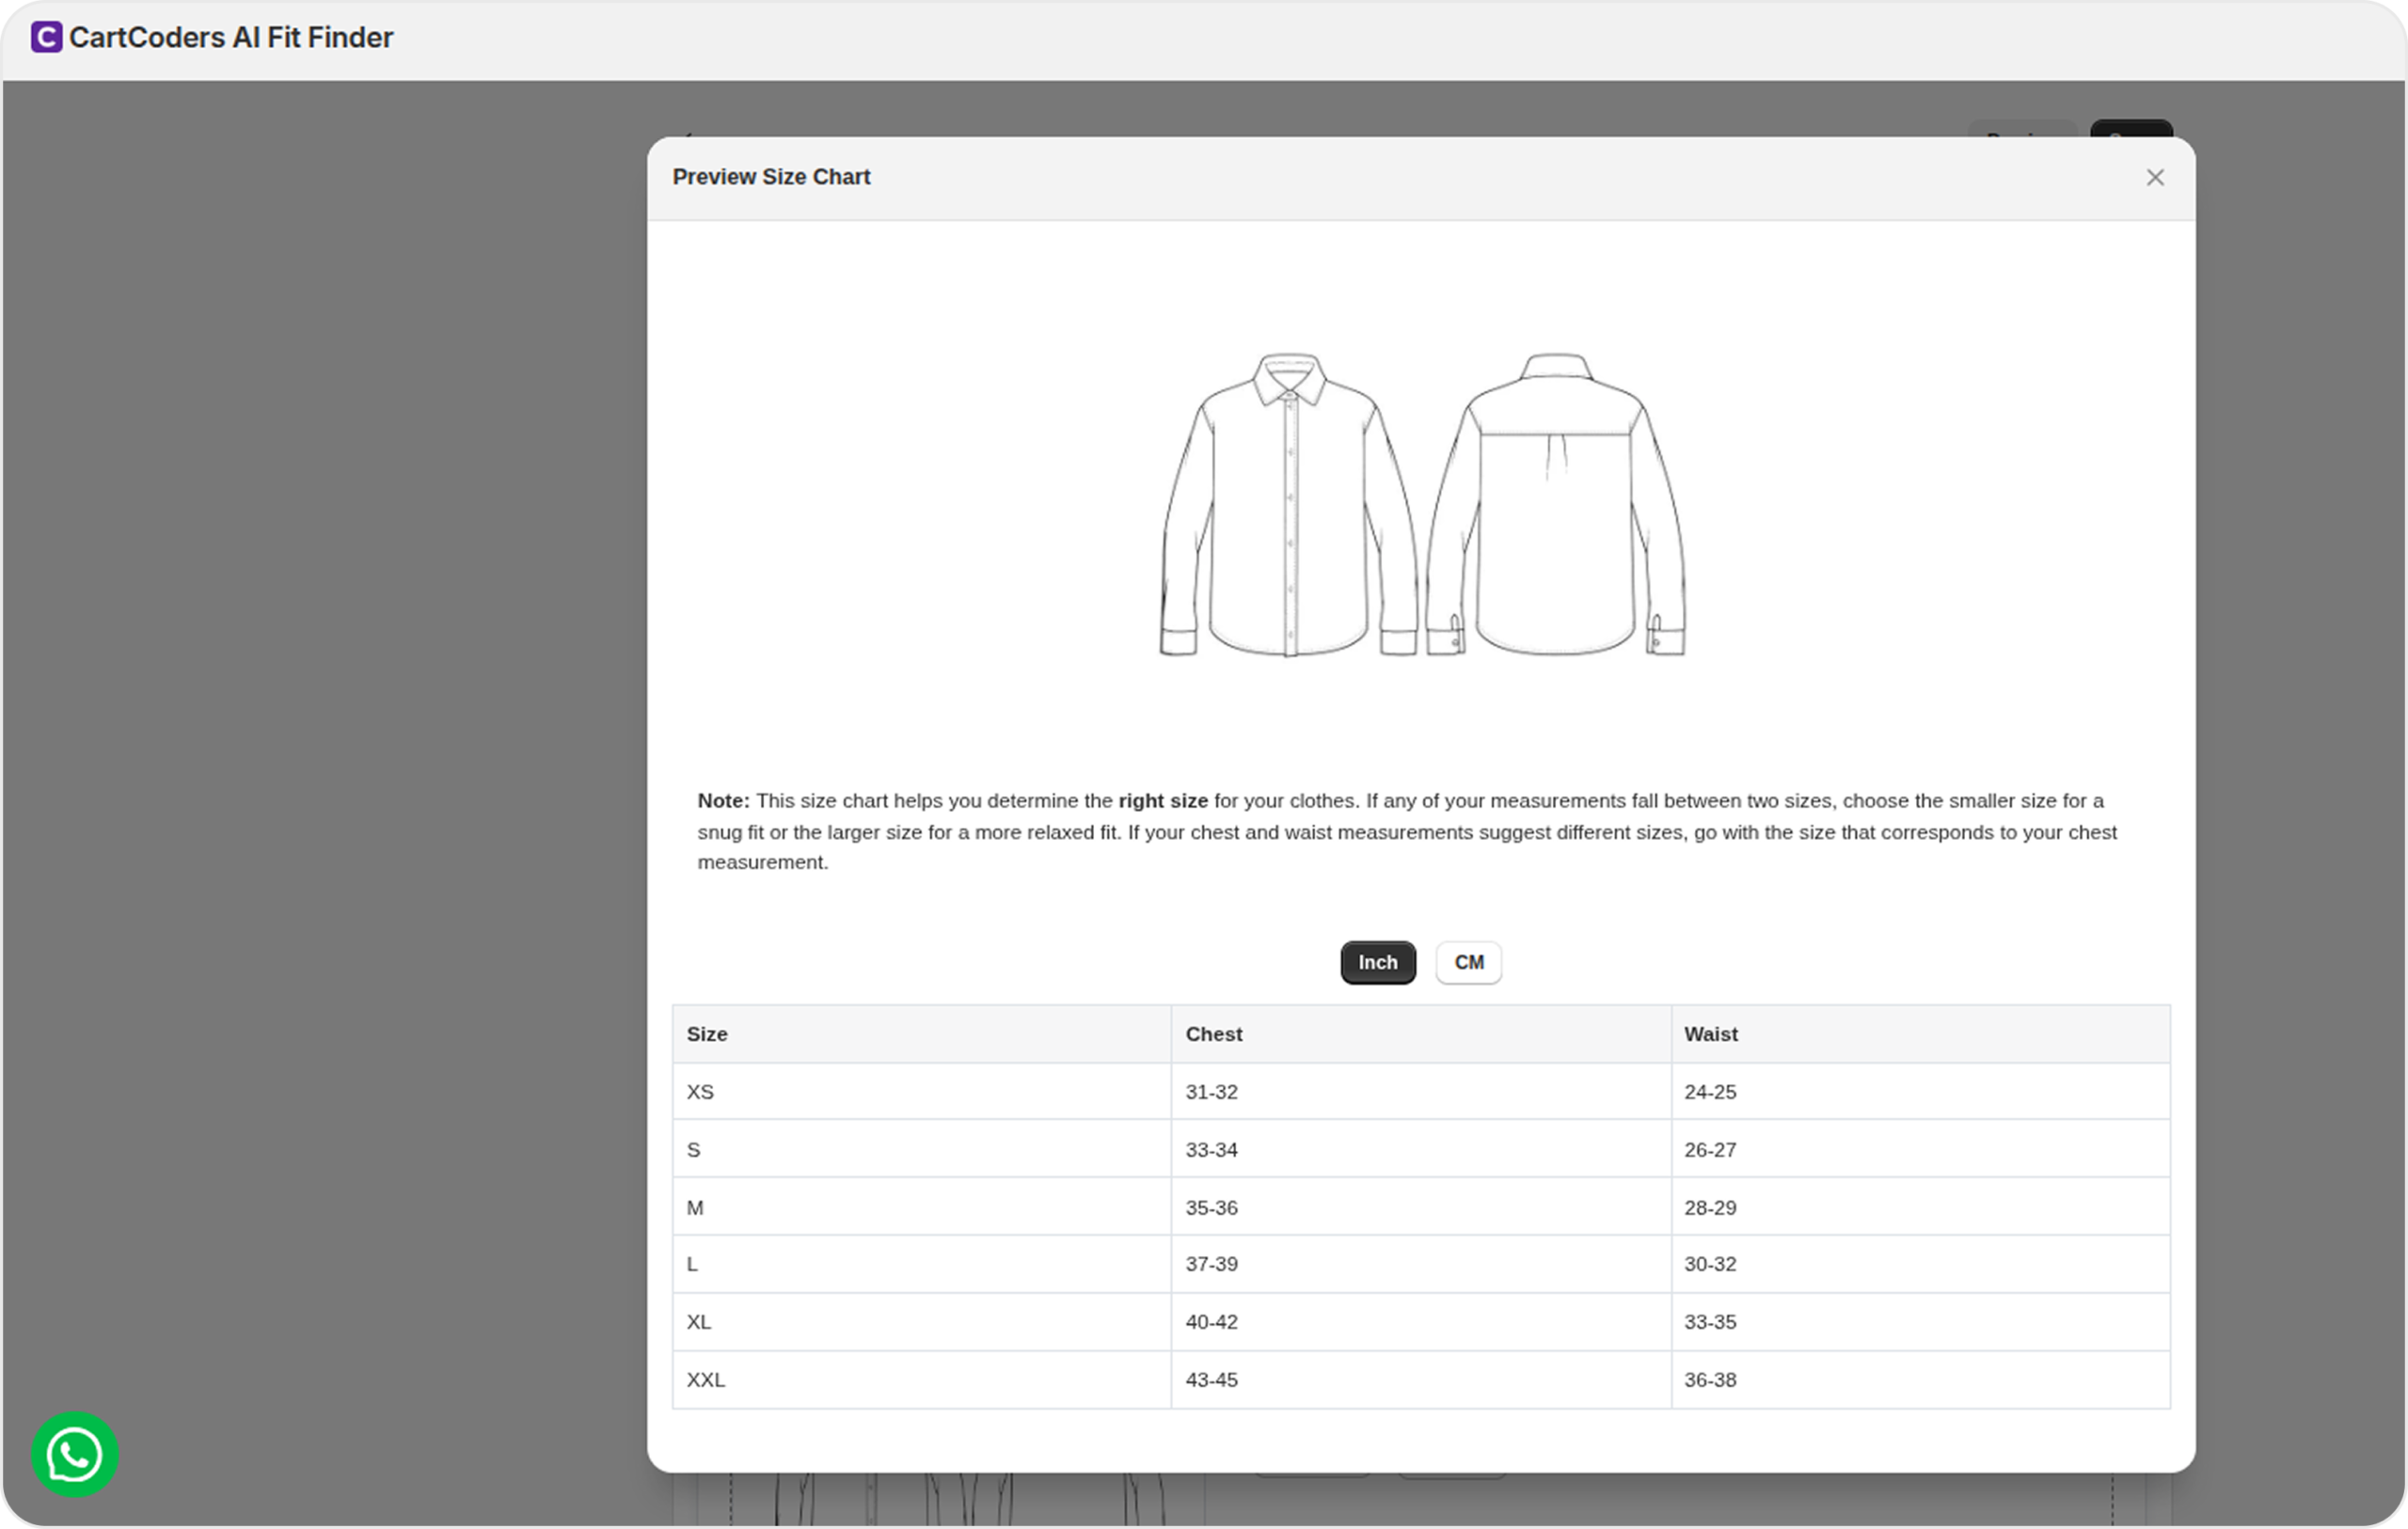
Preview & Save
This ensures your guide looks perfect and functions correctly on your store.
Save – Save all the changes and data you’ve added to the size guide to ensure it’s applied correctly and ready for customers to view.